
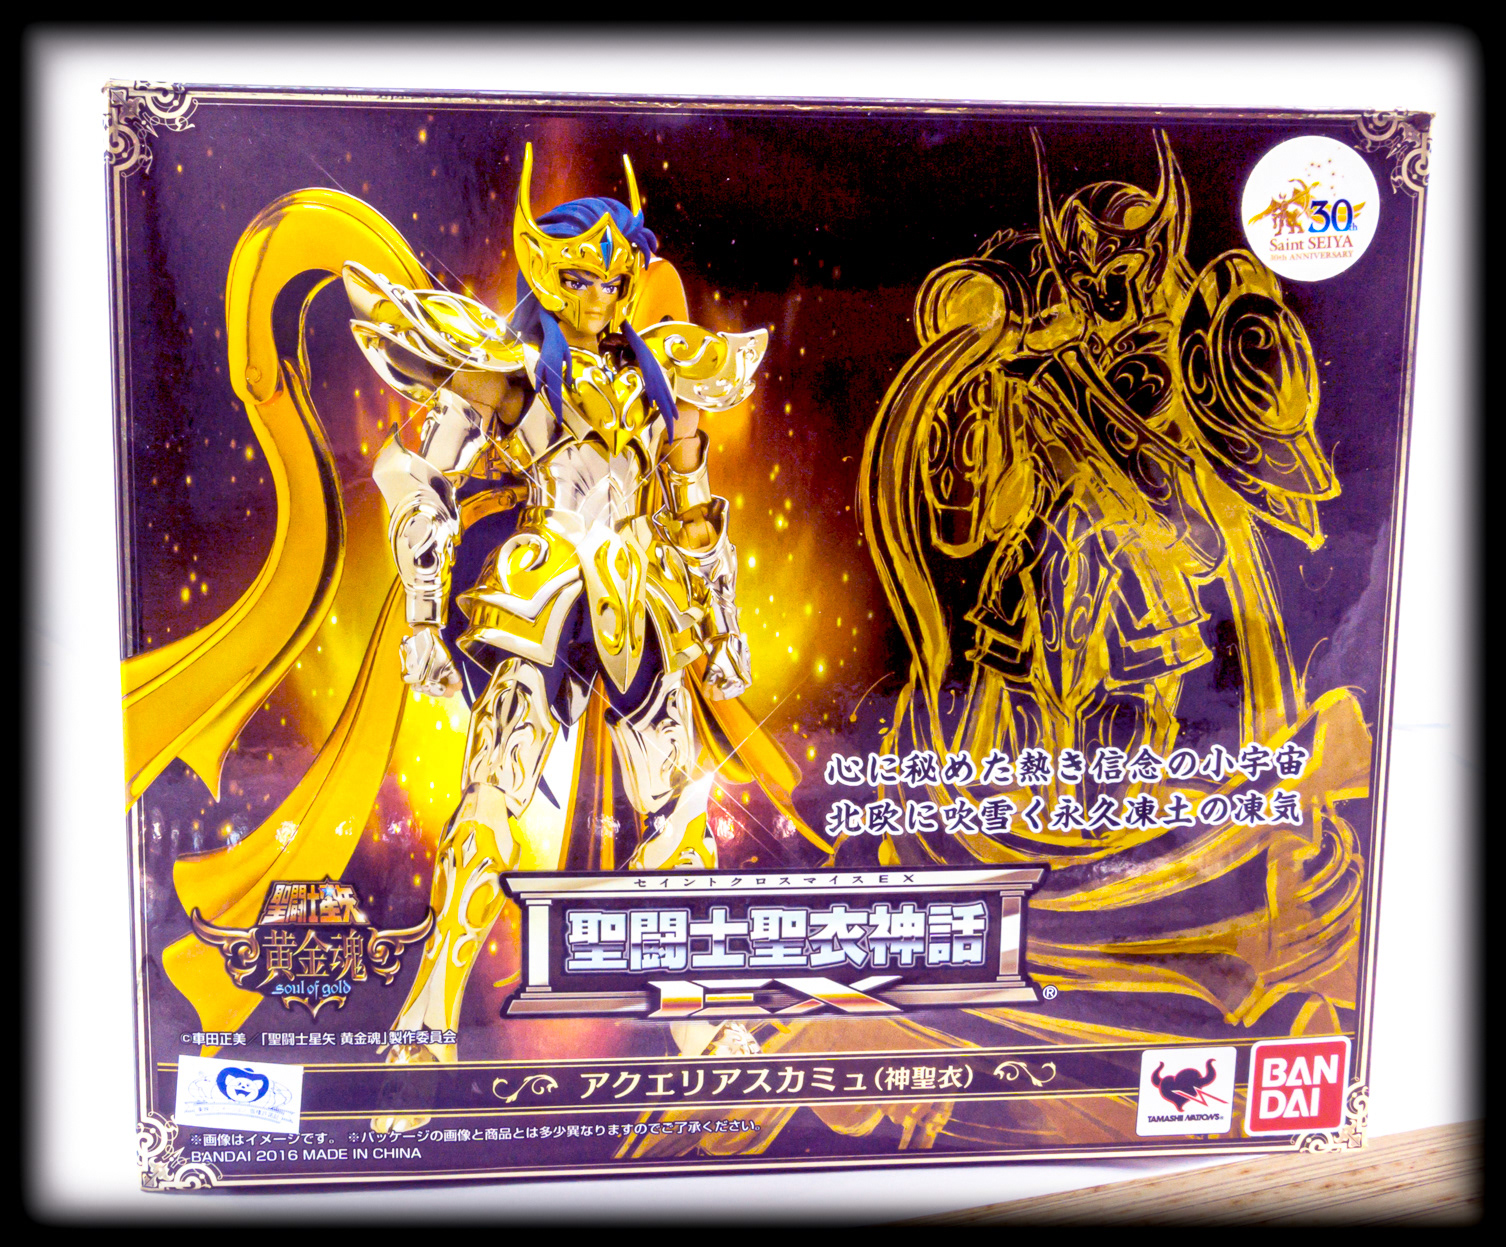
Aquarius - Camus - Zodiac Gold Knight
Myth Cloth Ex - Soul Of Gold - Saint Seiya


I. Concept Art processes.
1. The objectives is :
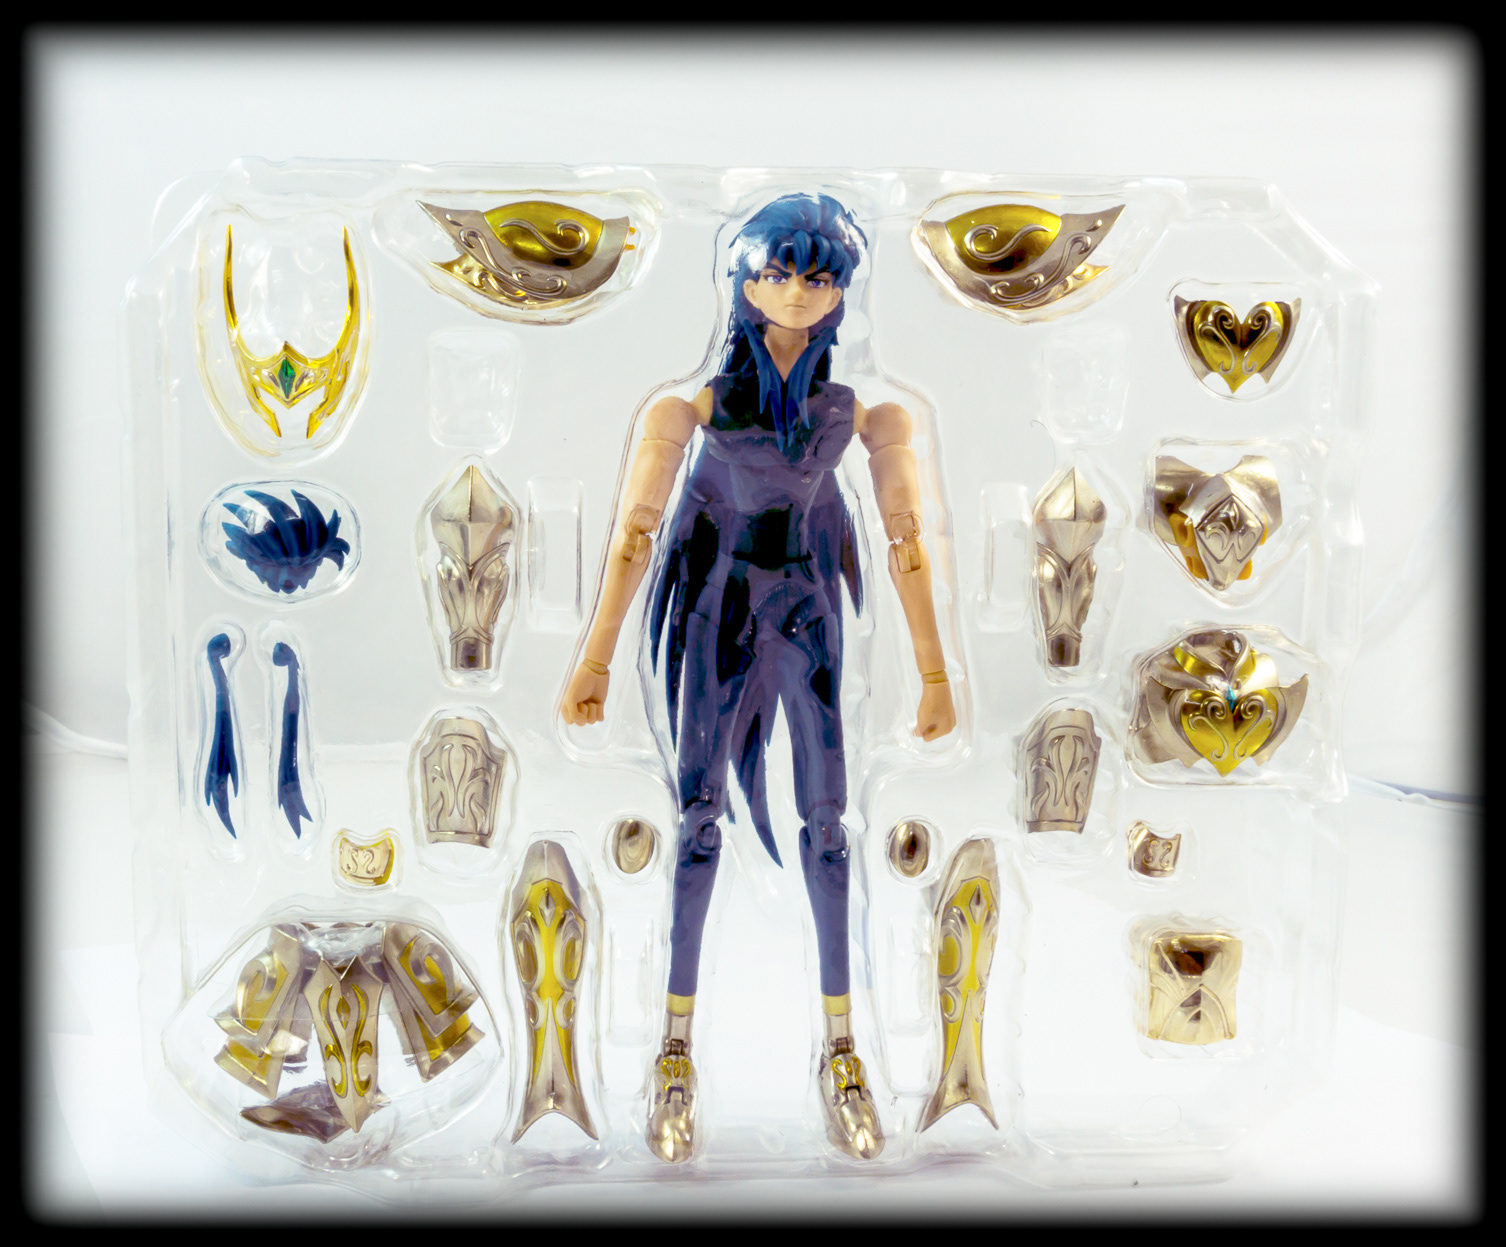
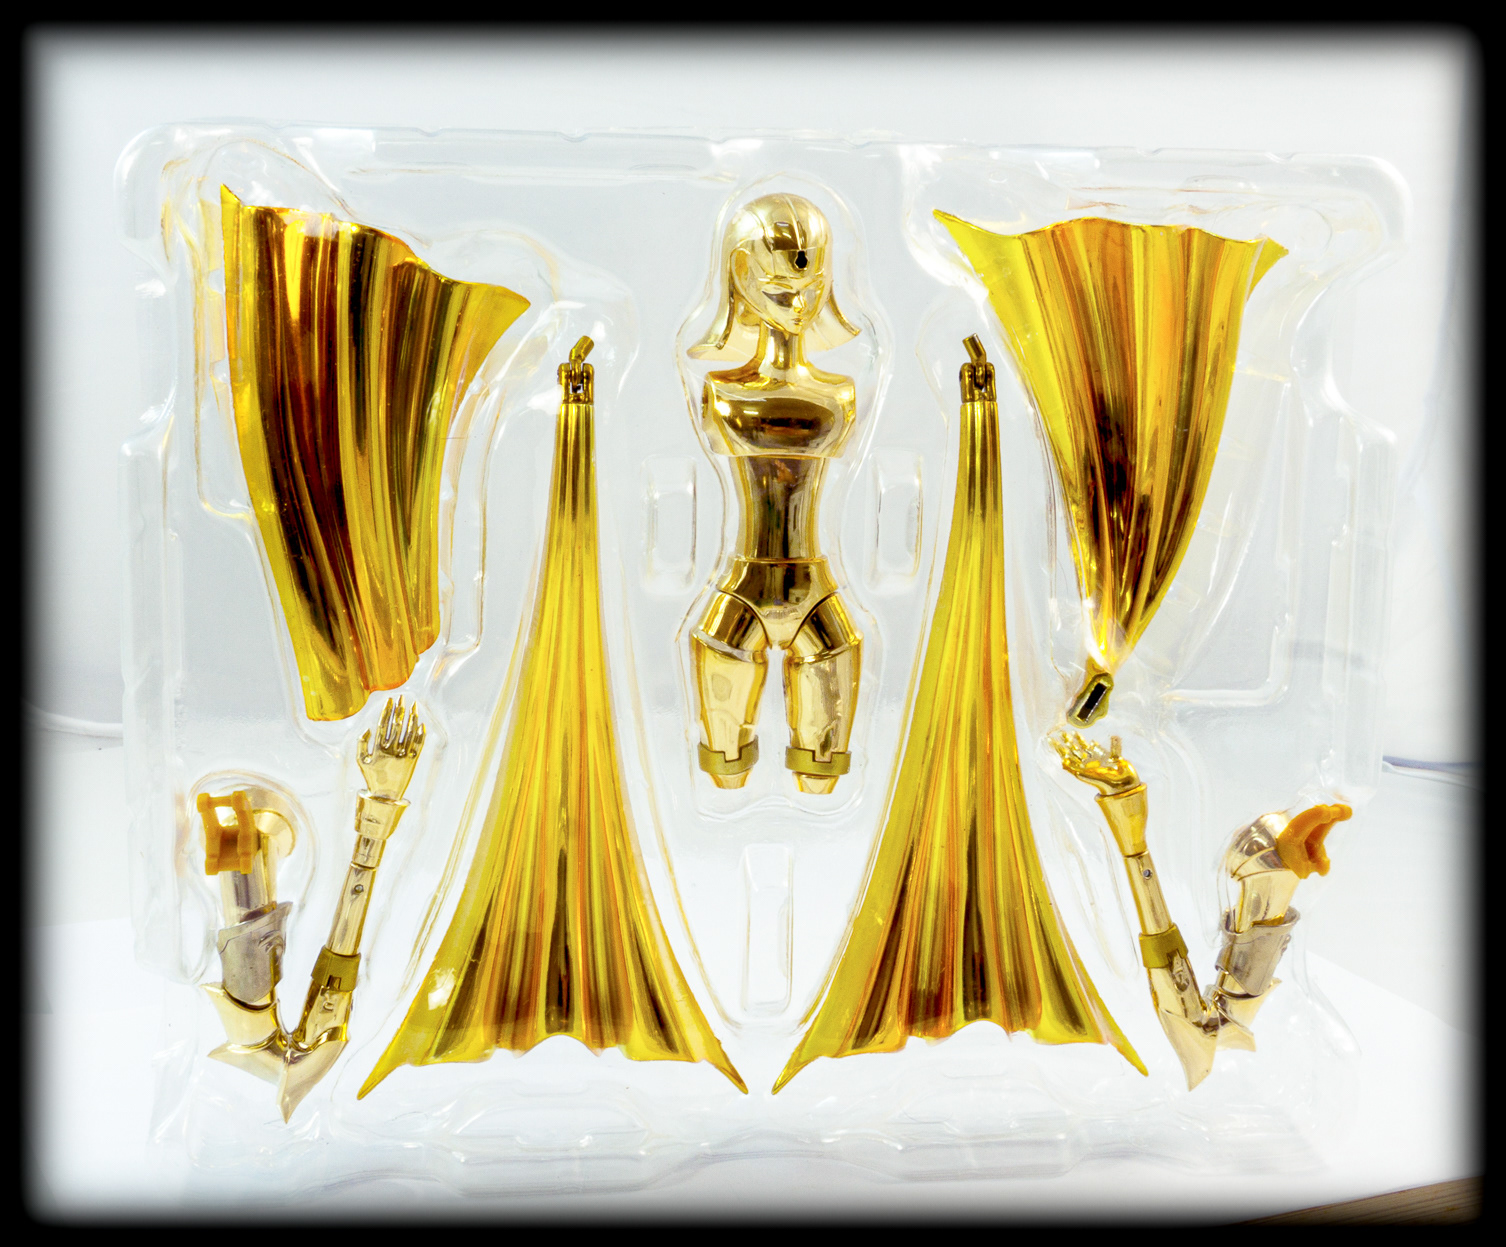
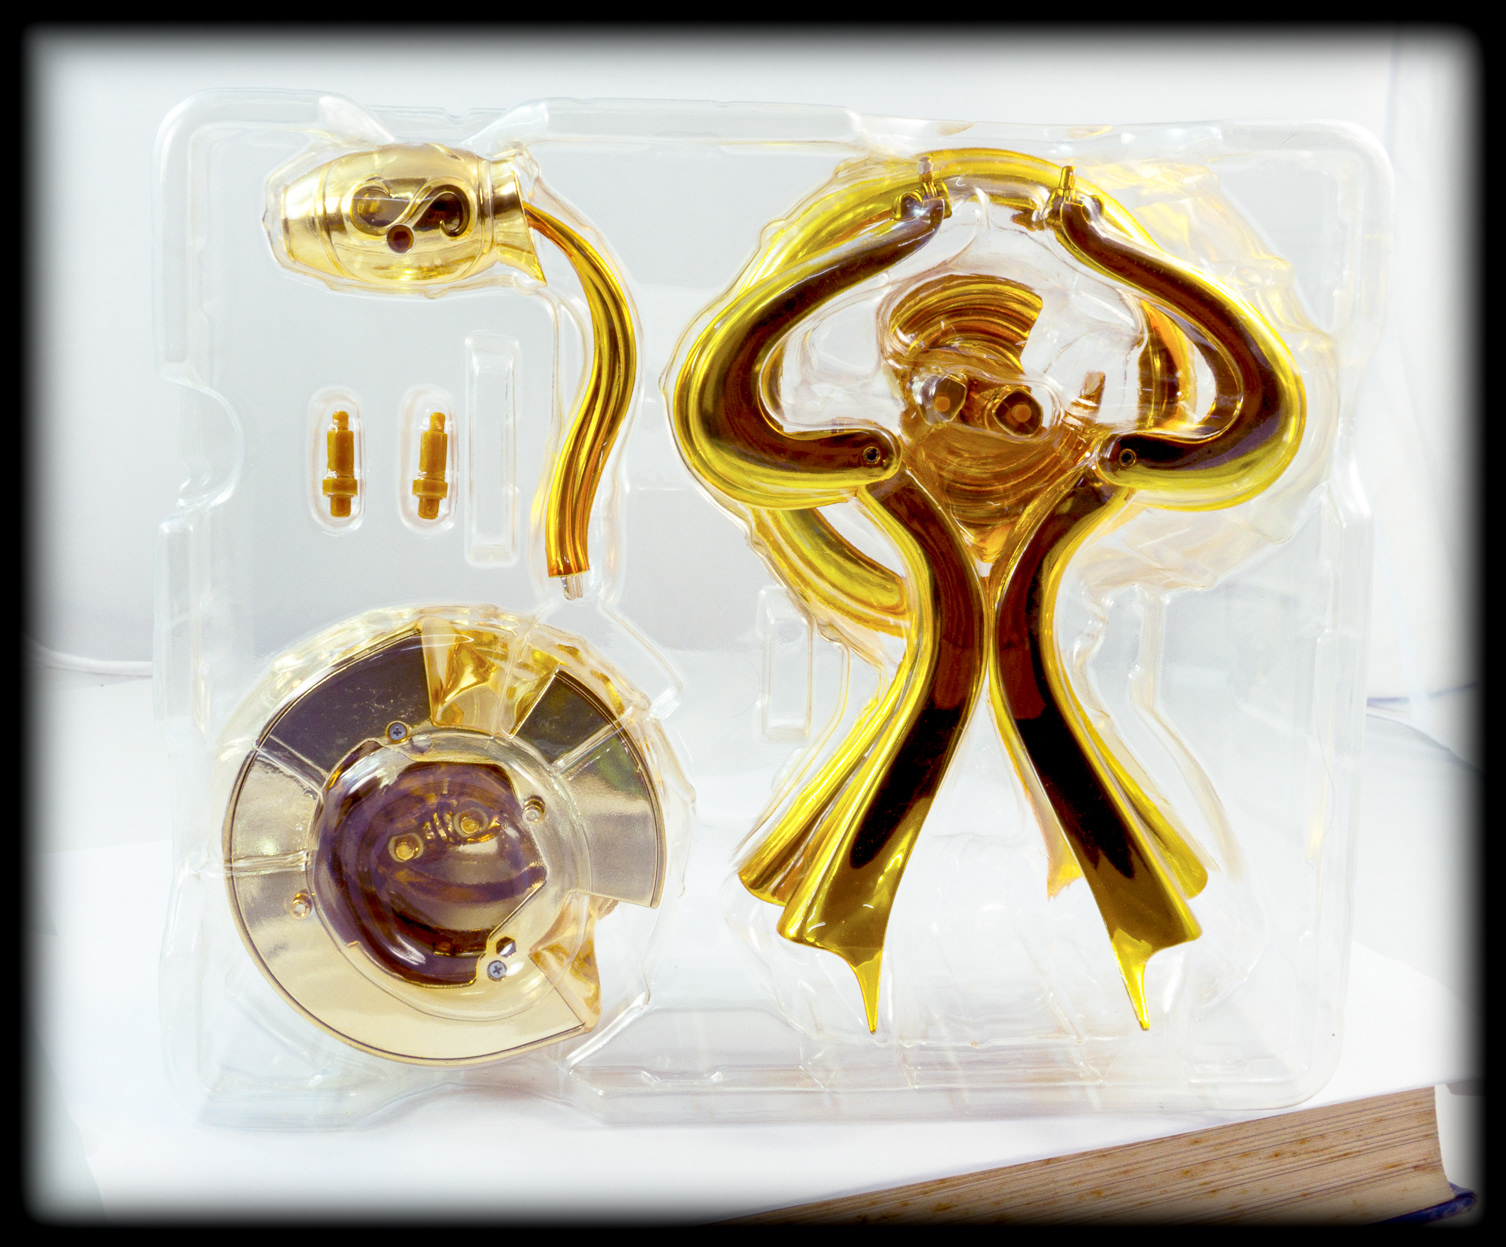
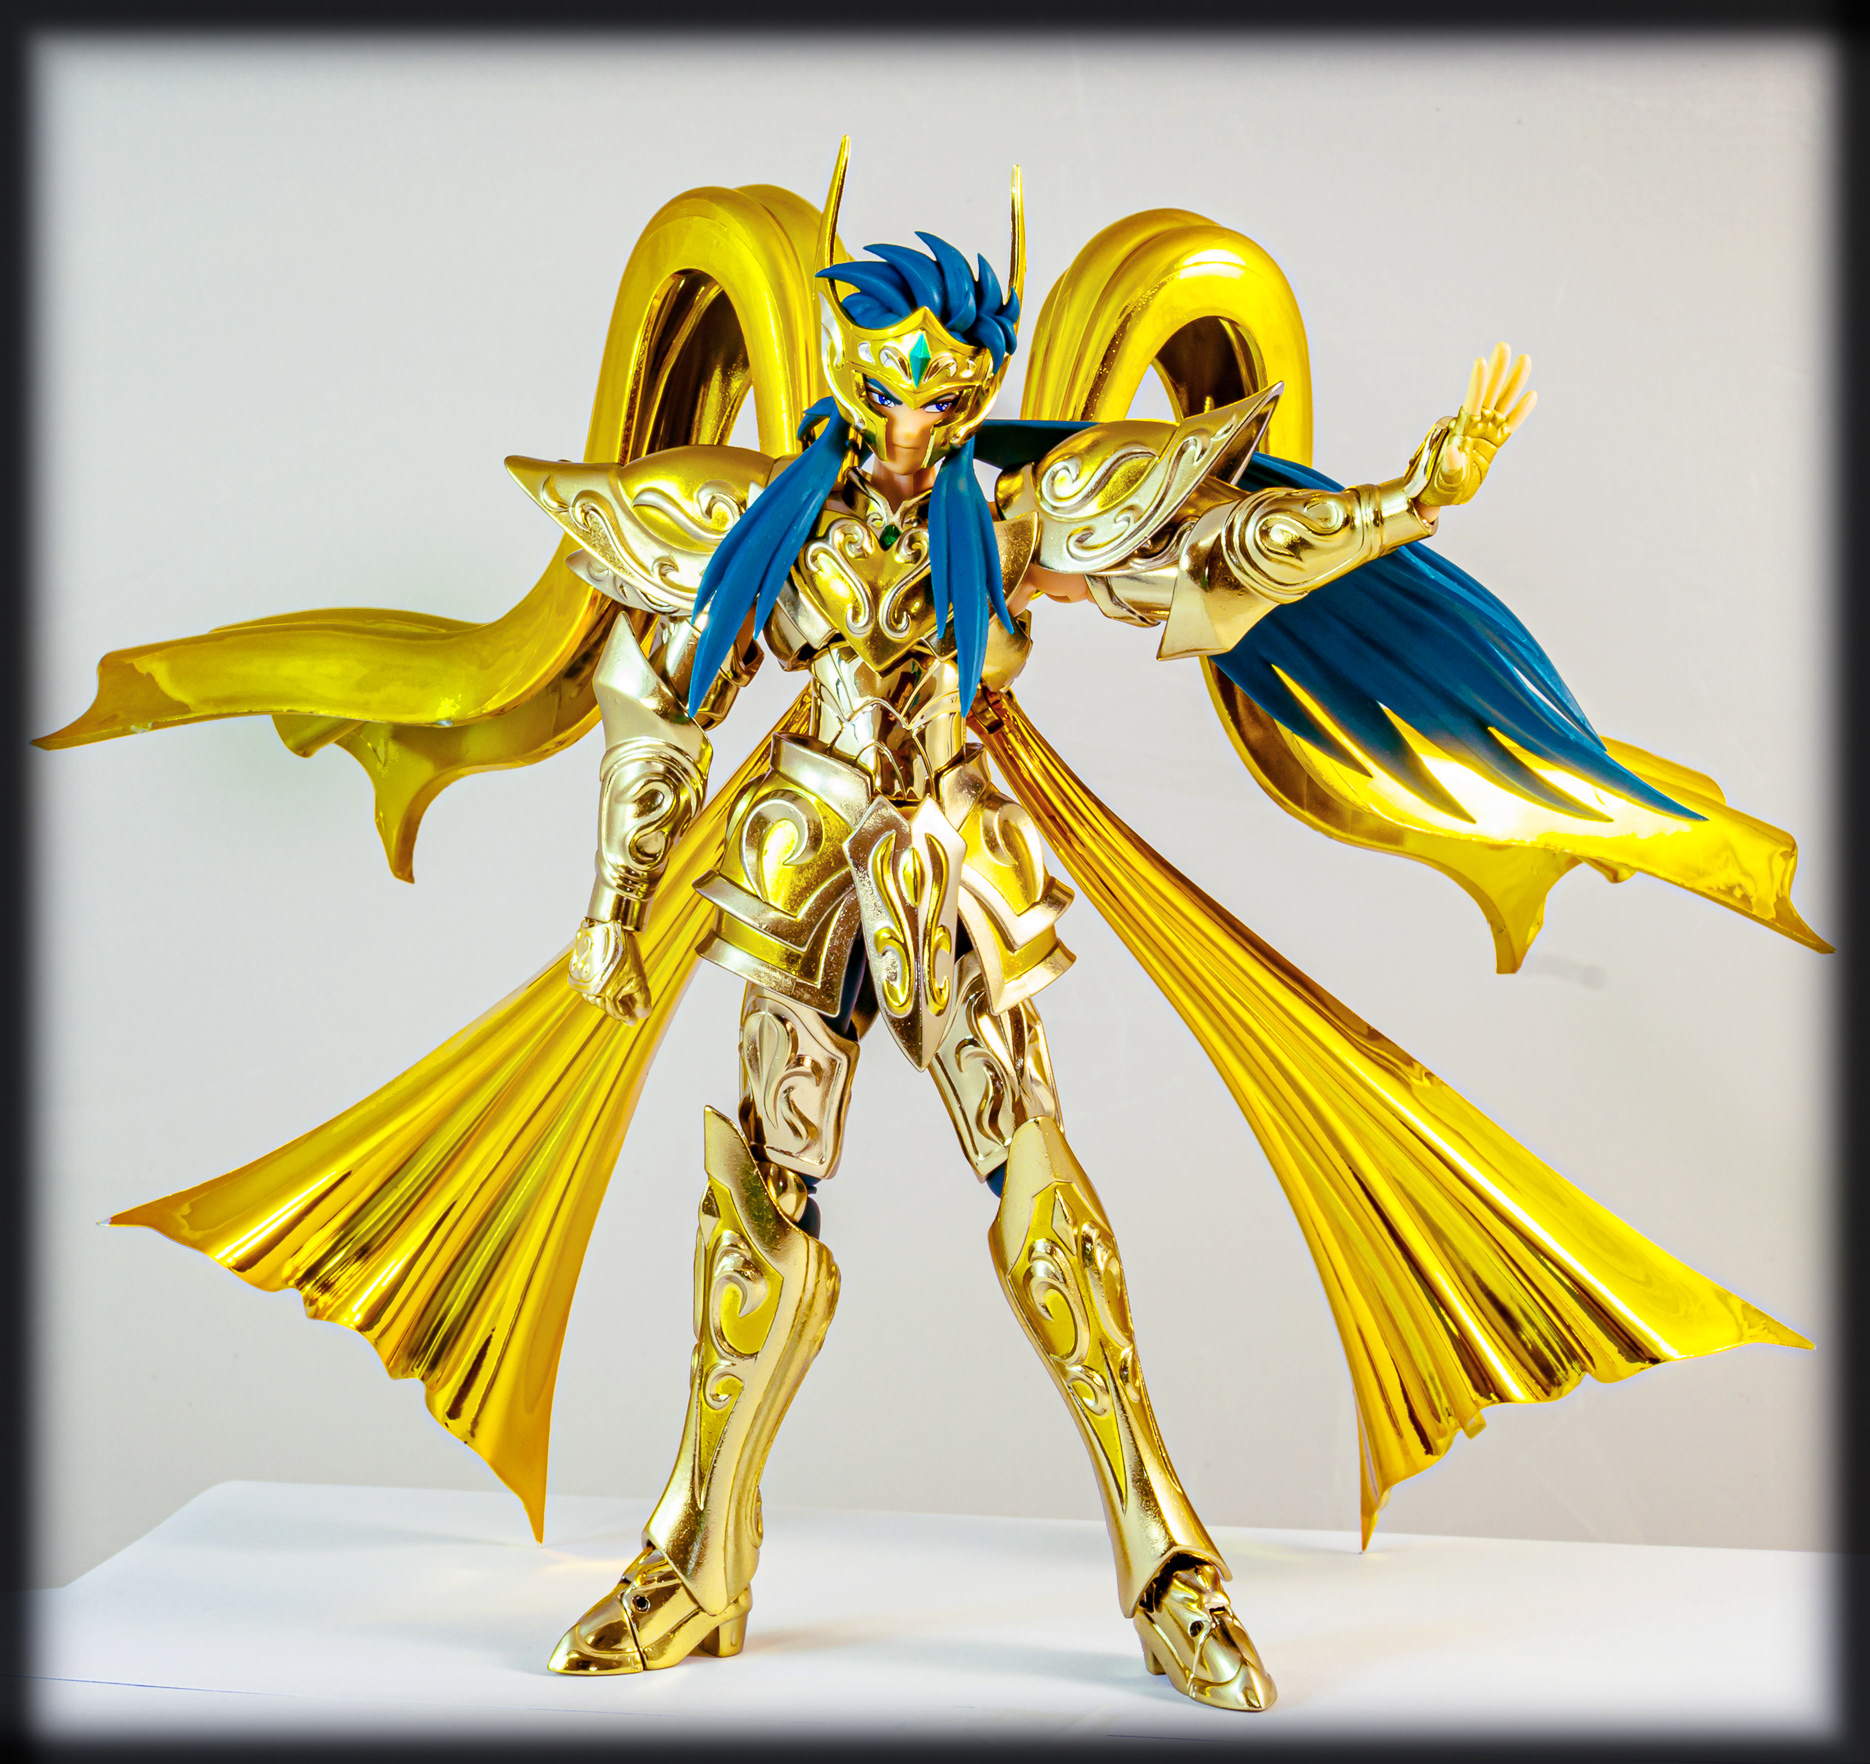
- to use the following action figure: "Myth Cloth Ex - Aquarius - Camus - God Cloth" built by "Tamashii Nations".
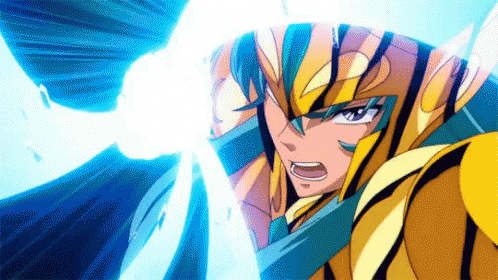
- to simulate the following attack: "Diamond Dust" that we can observe behind from the anime.
2. The Character is "Camus", the "Aquarius Zodiac Gold Knight" from "Saint Seiya - Soul of Gold" anime and manga.
3. Photbashing, photo-manipulation and others visual effects generation will be used.
II. Character Posing and photo shoot.
1. One of the most crucial and important process is the posing of the character.
- The angle and the view of the camera needs to give an anime or real-human expression to the character.
- The angle and the view of the camera needs to give an anime or real-human expression to the character.
2. Camera Settings
2.1. "ISO" setting is set at "100" in order to remove noise. A tripod is used.
2.2. Small aperture is set between "f16" or "f18" , so details can be captured.
2.3. Object does not move, smaller shutter speed is set at "1/5" value.
Courtesy of "photograhylife.com" and the following articles:
2.4. Exposure is set between "-0.8" to "1.0".
- Value can be approached by fine tuning the shutter speed value and, if needed, the aperture value (no less than f16).
- We can also correct the exposure later with the use of "Adobe Lightroom" if needed.
3. First corrections is edited in "Adobe Lightroom" : exposure is fine tuned at the same time of the shadows, the noise reduction and the sharpening settings.
Gratitude to: "PHLearn": "How to Correct Overexposure in Lightroom"
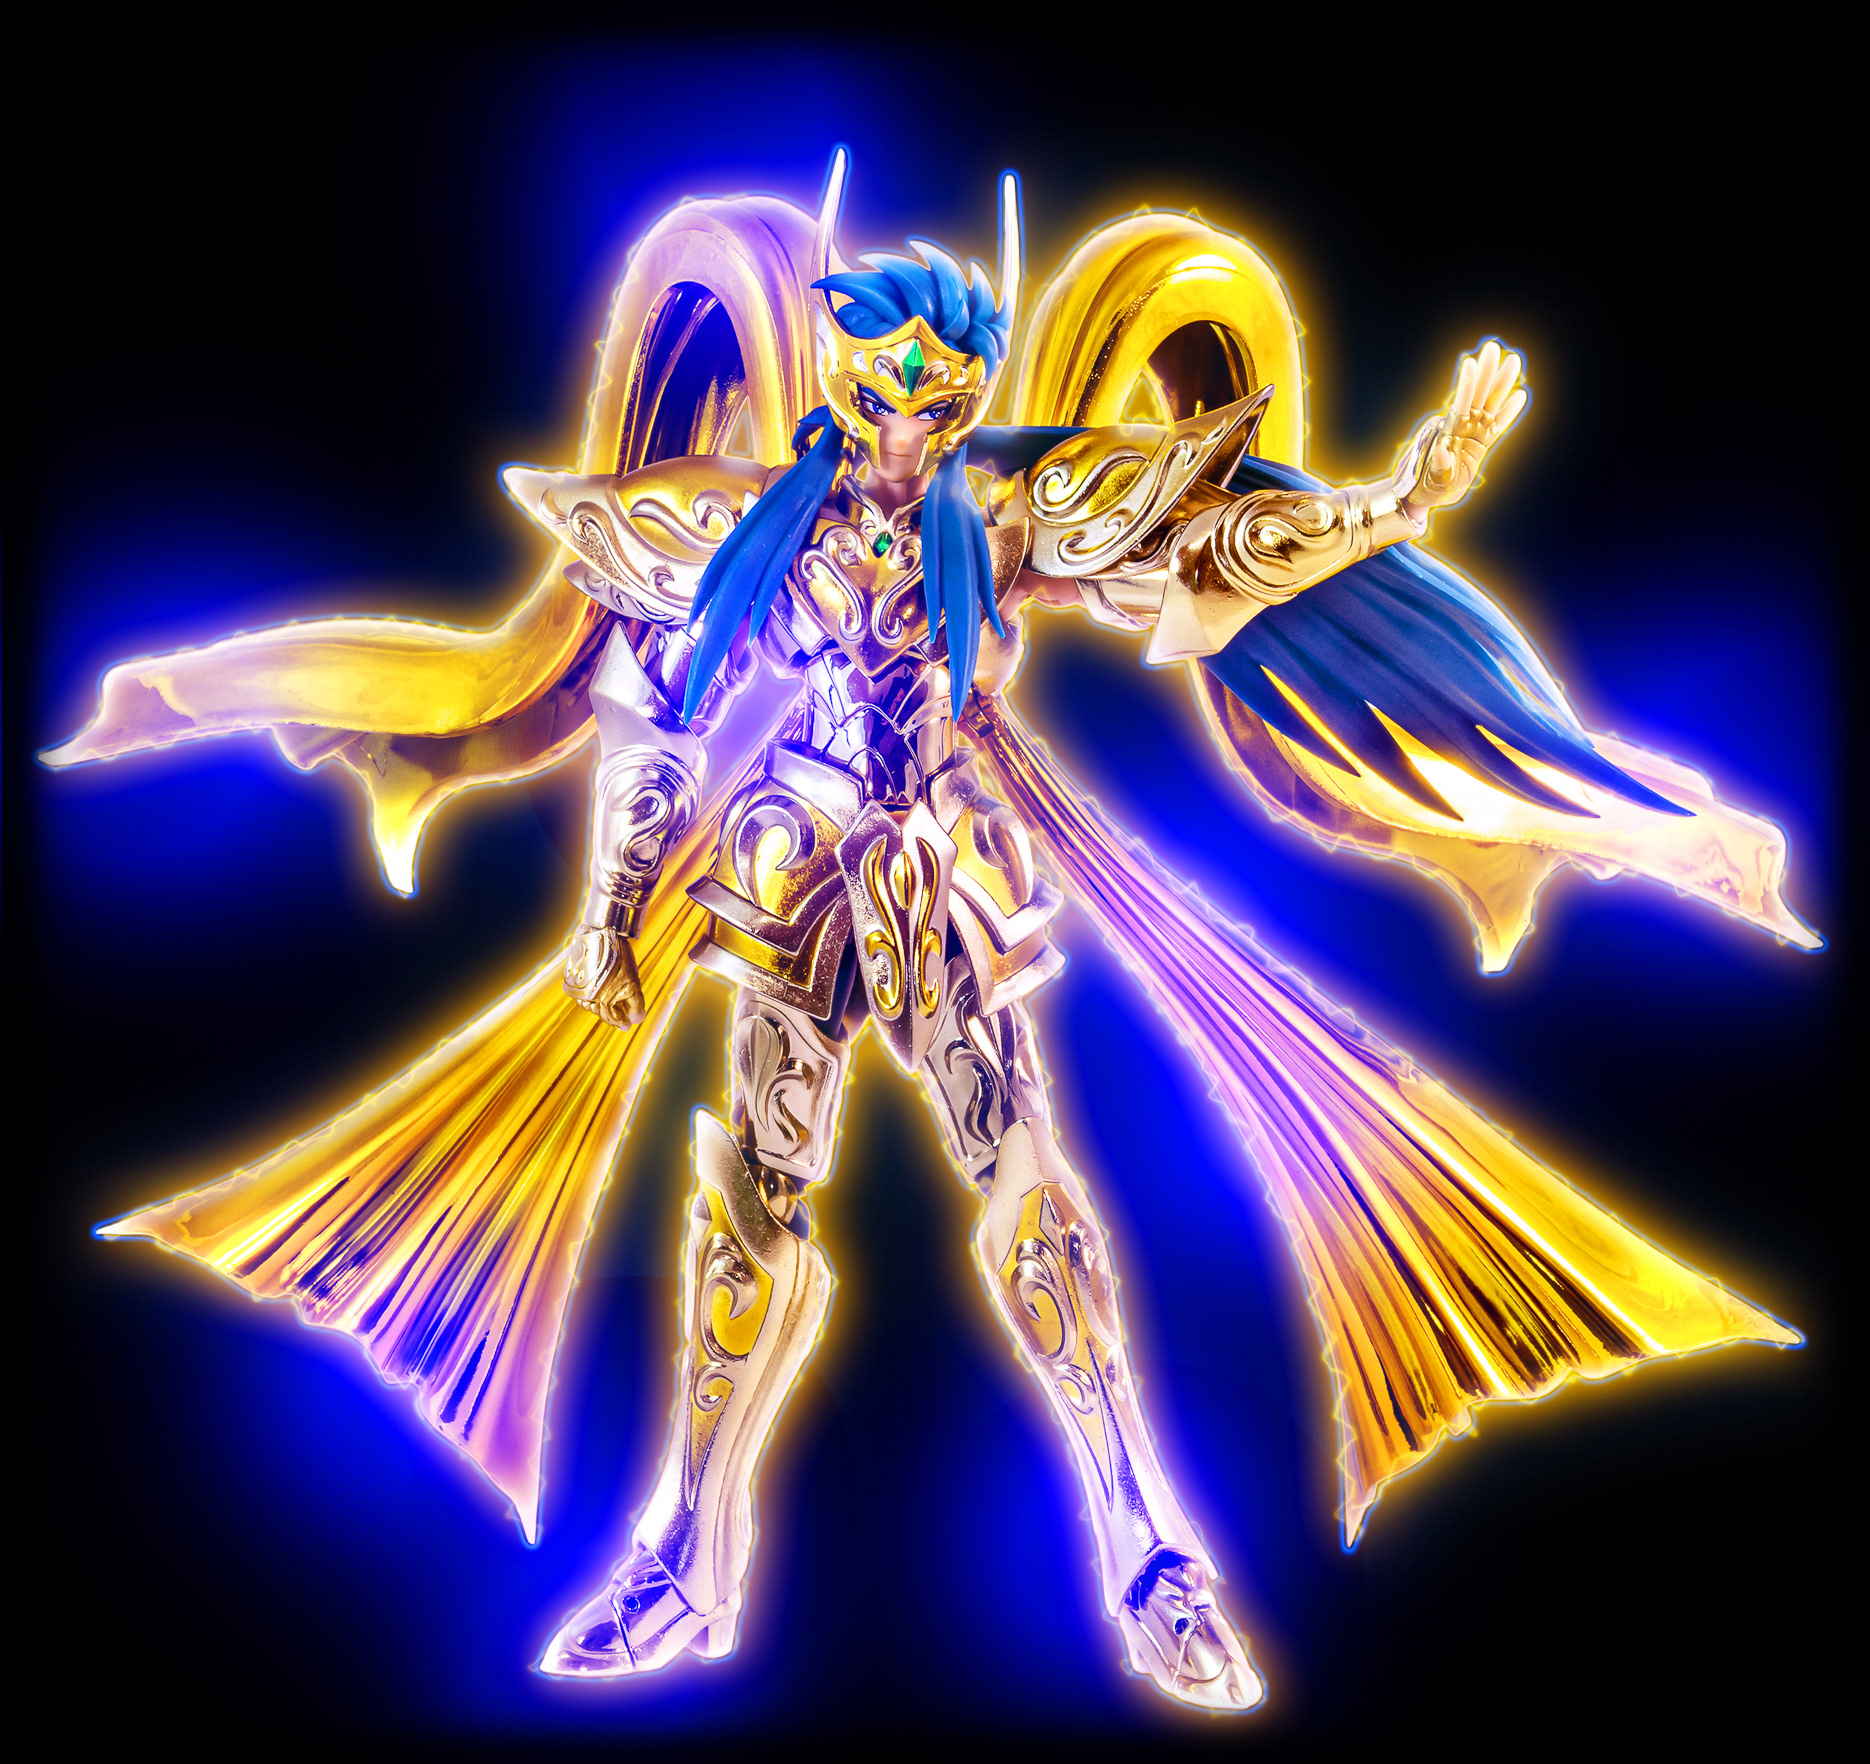
III. Character Re-Editing.
- In "Adobe Photoshop", the layer is reedited many times in order to give different shades on different parts.
1. Step 1:
Layer-A: Normal (Smart Filter – Shake Reduction – Blur Trace Bounds @ 30px – Smoothing @ 30% and Artifact Suppression@ 30%) @ opacity 45%
Layer-B: Normal @ 100% opacity
Layer 1: Merging "Layer-A" and "Layer-B"
2. Step 2:
Layer 2: Layer 1 duplicated and rasterized (take less space than smart filter): Overlay @ 15% opacity
Layer 3: Layer 1 duplicated and rasterized: Soft Light @ 50% opacity
3. Step 3:
Layer 4: Layer 1 duplicated and rasterized: Multiply @ 75% opacity (de-masking part of it)
Layer 5: Layer 1 duplicated and rasterized: Screen (de-masking some parts on hair and helmet)
4. Step 4:
Group 1: Layer 1 to Layer 6 are copied and merged. Face is just selected. Shadow on face is removed.
Courtesy of "PIXimperfect": "MAGICALLY Remove Shadows in Photoshop!"
Group 2: Layer 1 to Layer 6 are copied and merged. Both jewels are just selected. Shining and color filter is applied above to give more dehaze effect.
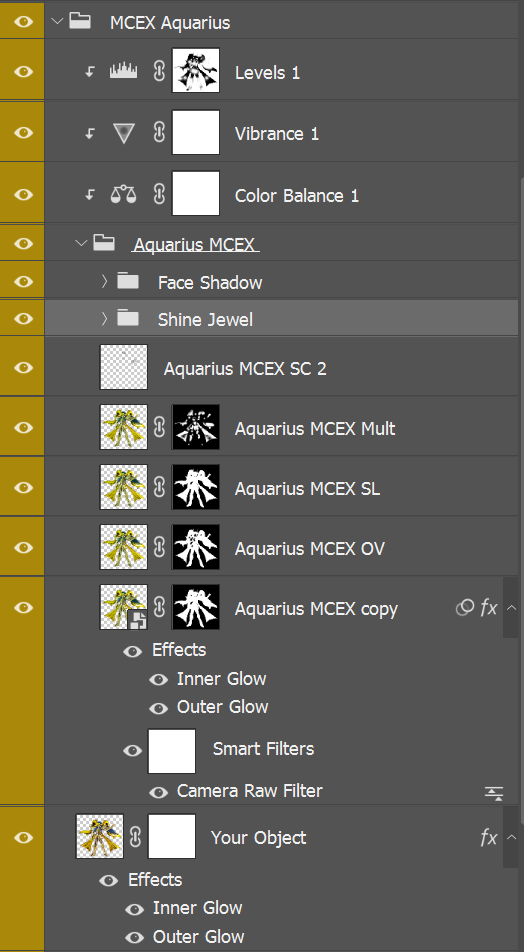
5. Final Result:
Group 3: Layer1 (downstairs of the queue) to Layer6 (Top of the queue), Group 2 and Group 1
Clipping Mask Filter 1 on Group 3: Levels (RGB: 0: 1.30: 240)
Clipping Mask Filter 2 on Group 3: Vibrance (25, 0)
Clipping Mask Filter 3 on Group 3: Color Balance (Midtones: 25: -15: 30)
Layer 1: Outer Glow (Overlay " fedd00"– 0 90 – Contour 1: Range 50% Anti-Aliased)
Layer 1 duplicated: Outer Glow (Color Dodge " ff8a00"– 0 135 – Contour 1: Range 50% Anti-Aliased) Inner Glow (Soft Light " ffc600"– 15 80 – Contour 1: Range 50% Anti-Aliased)
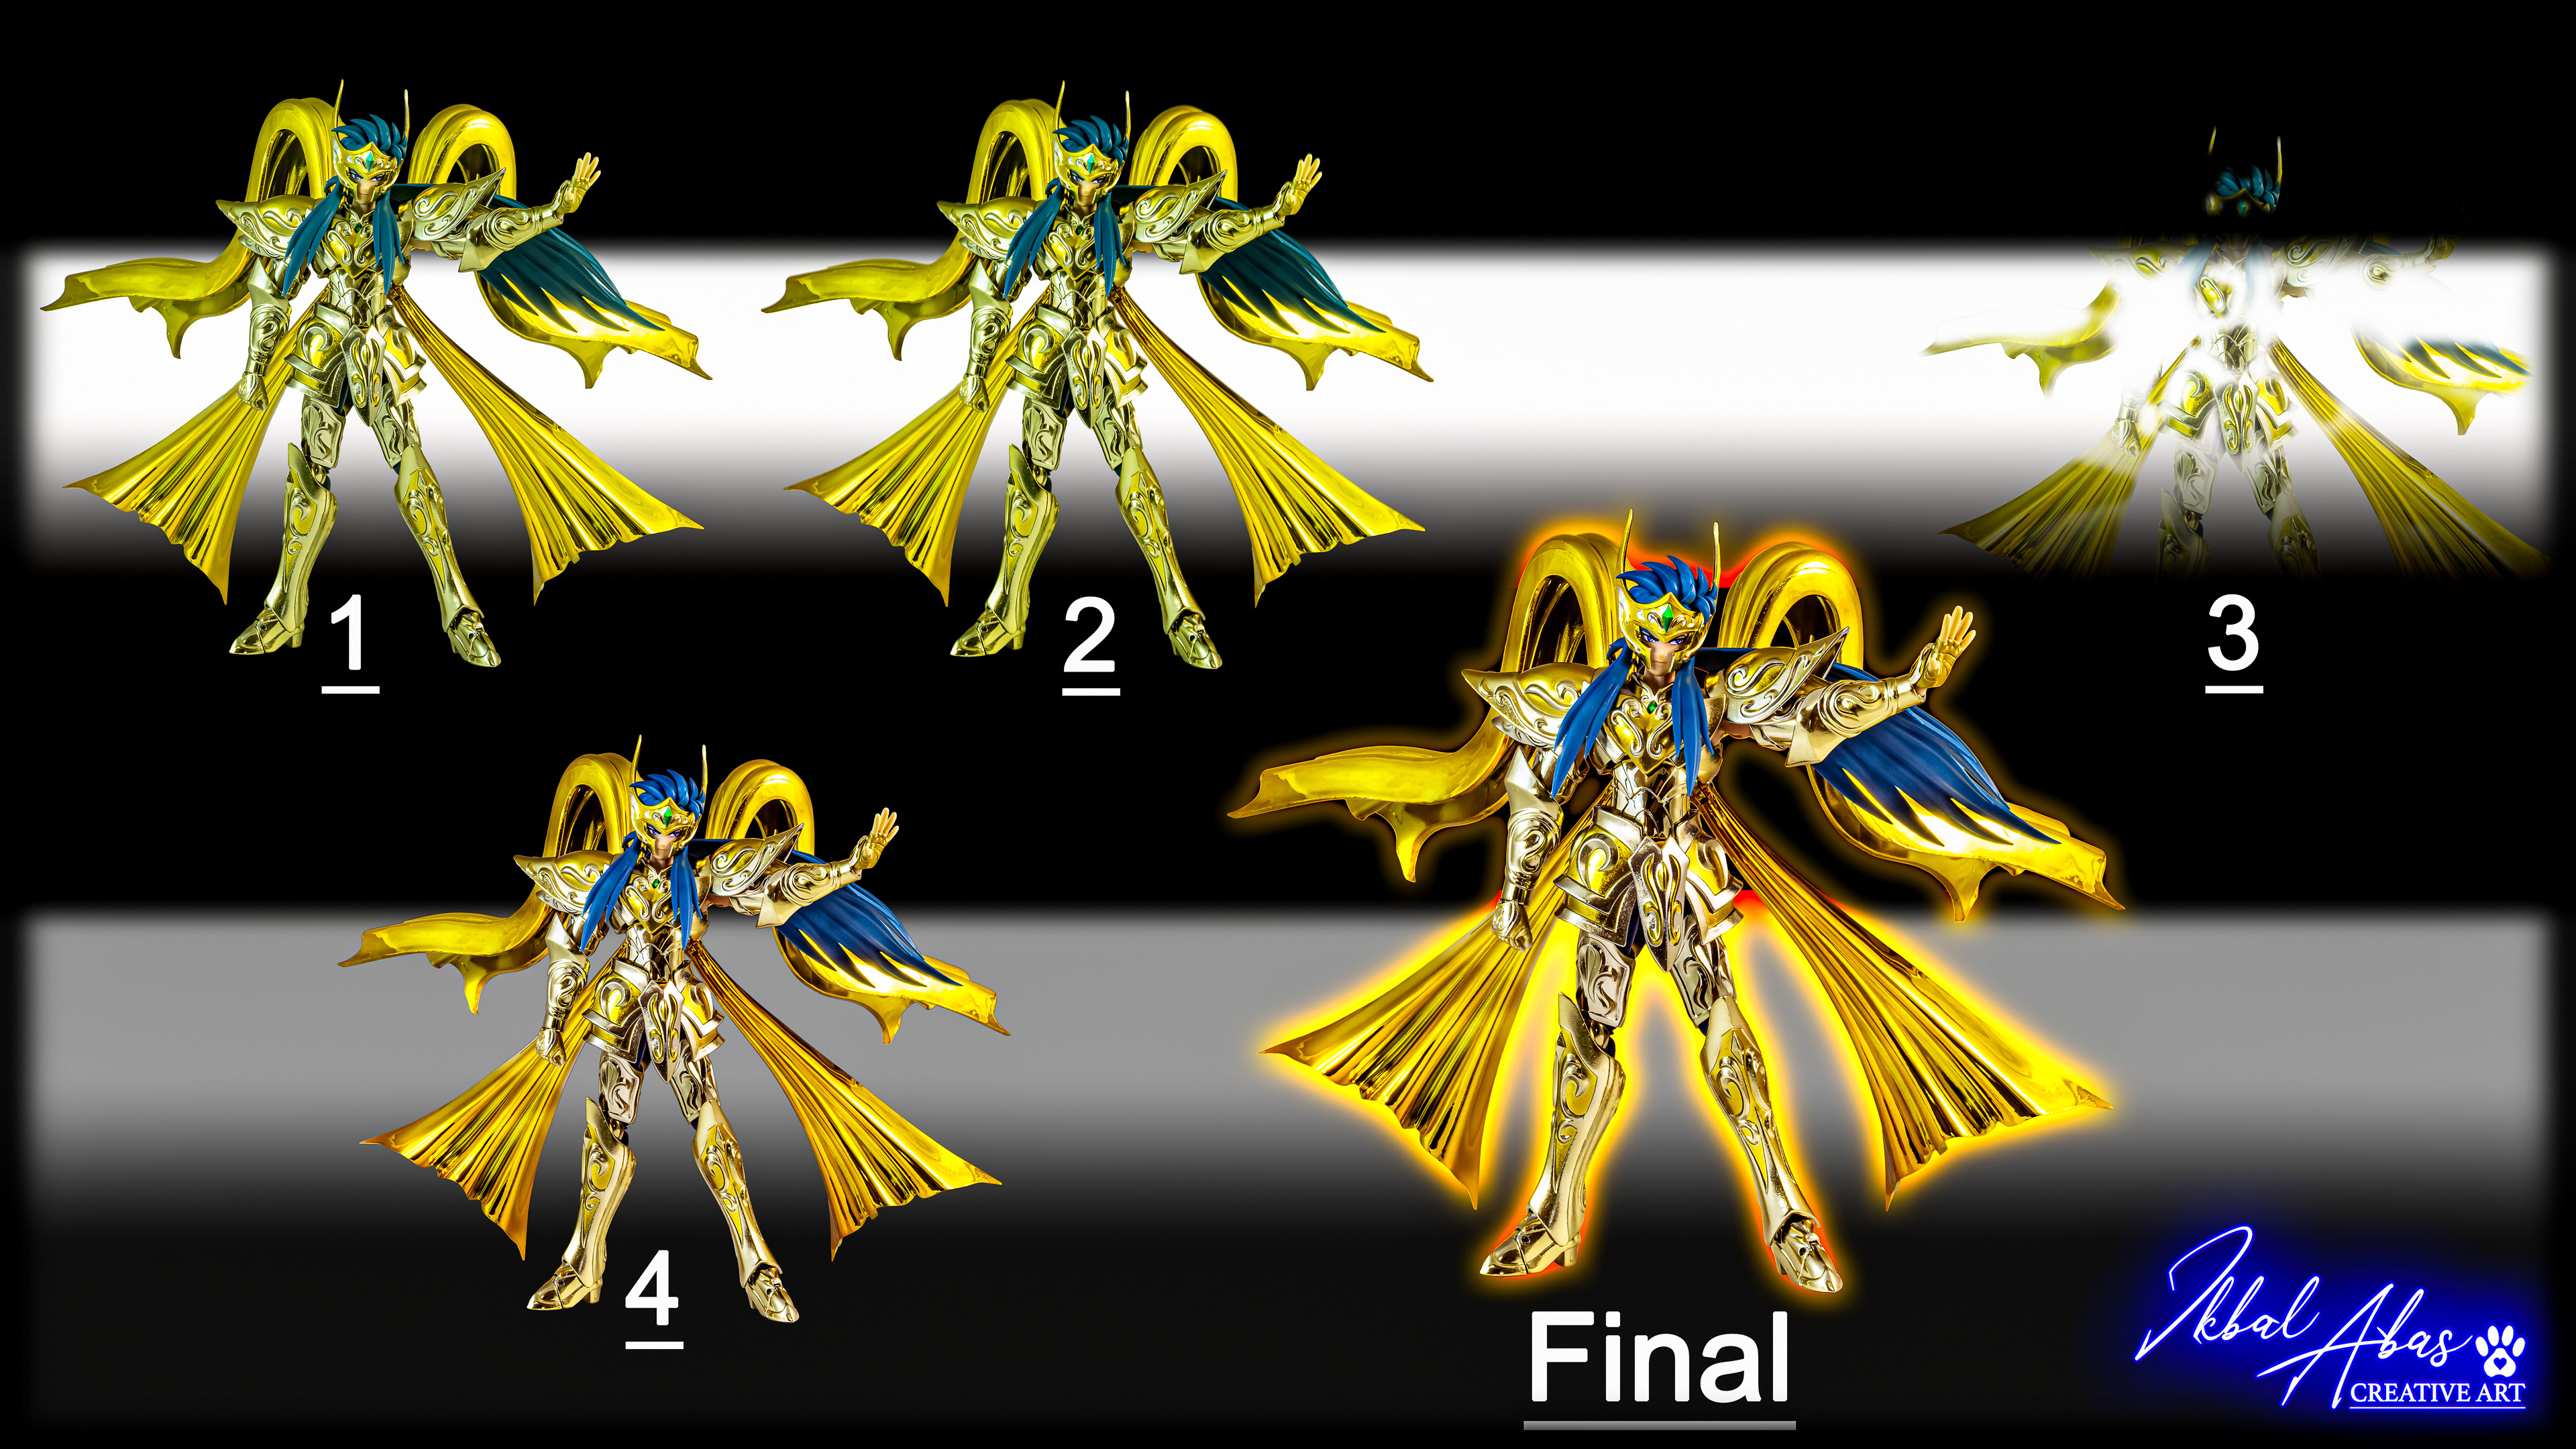
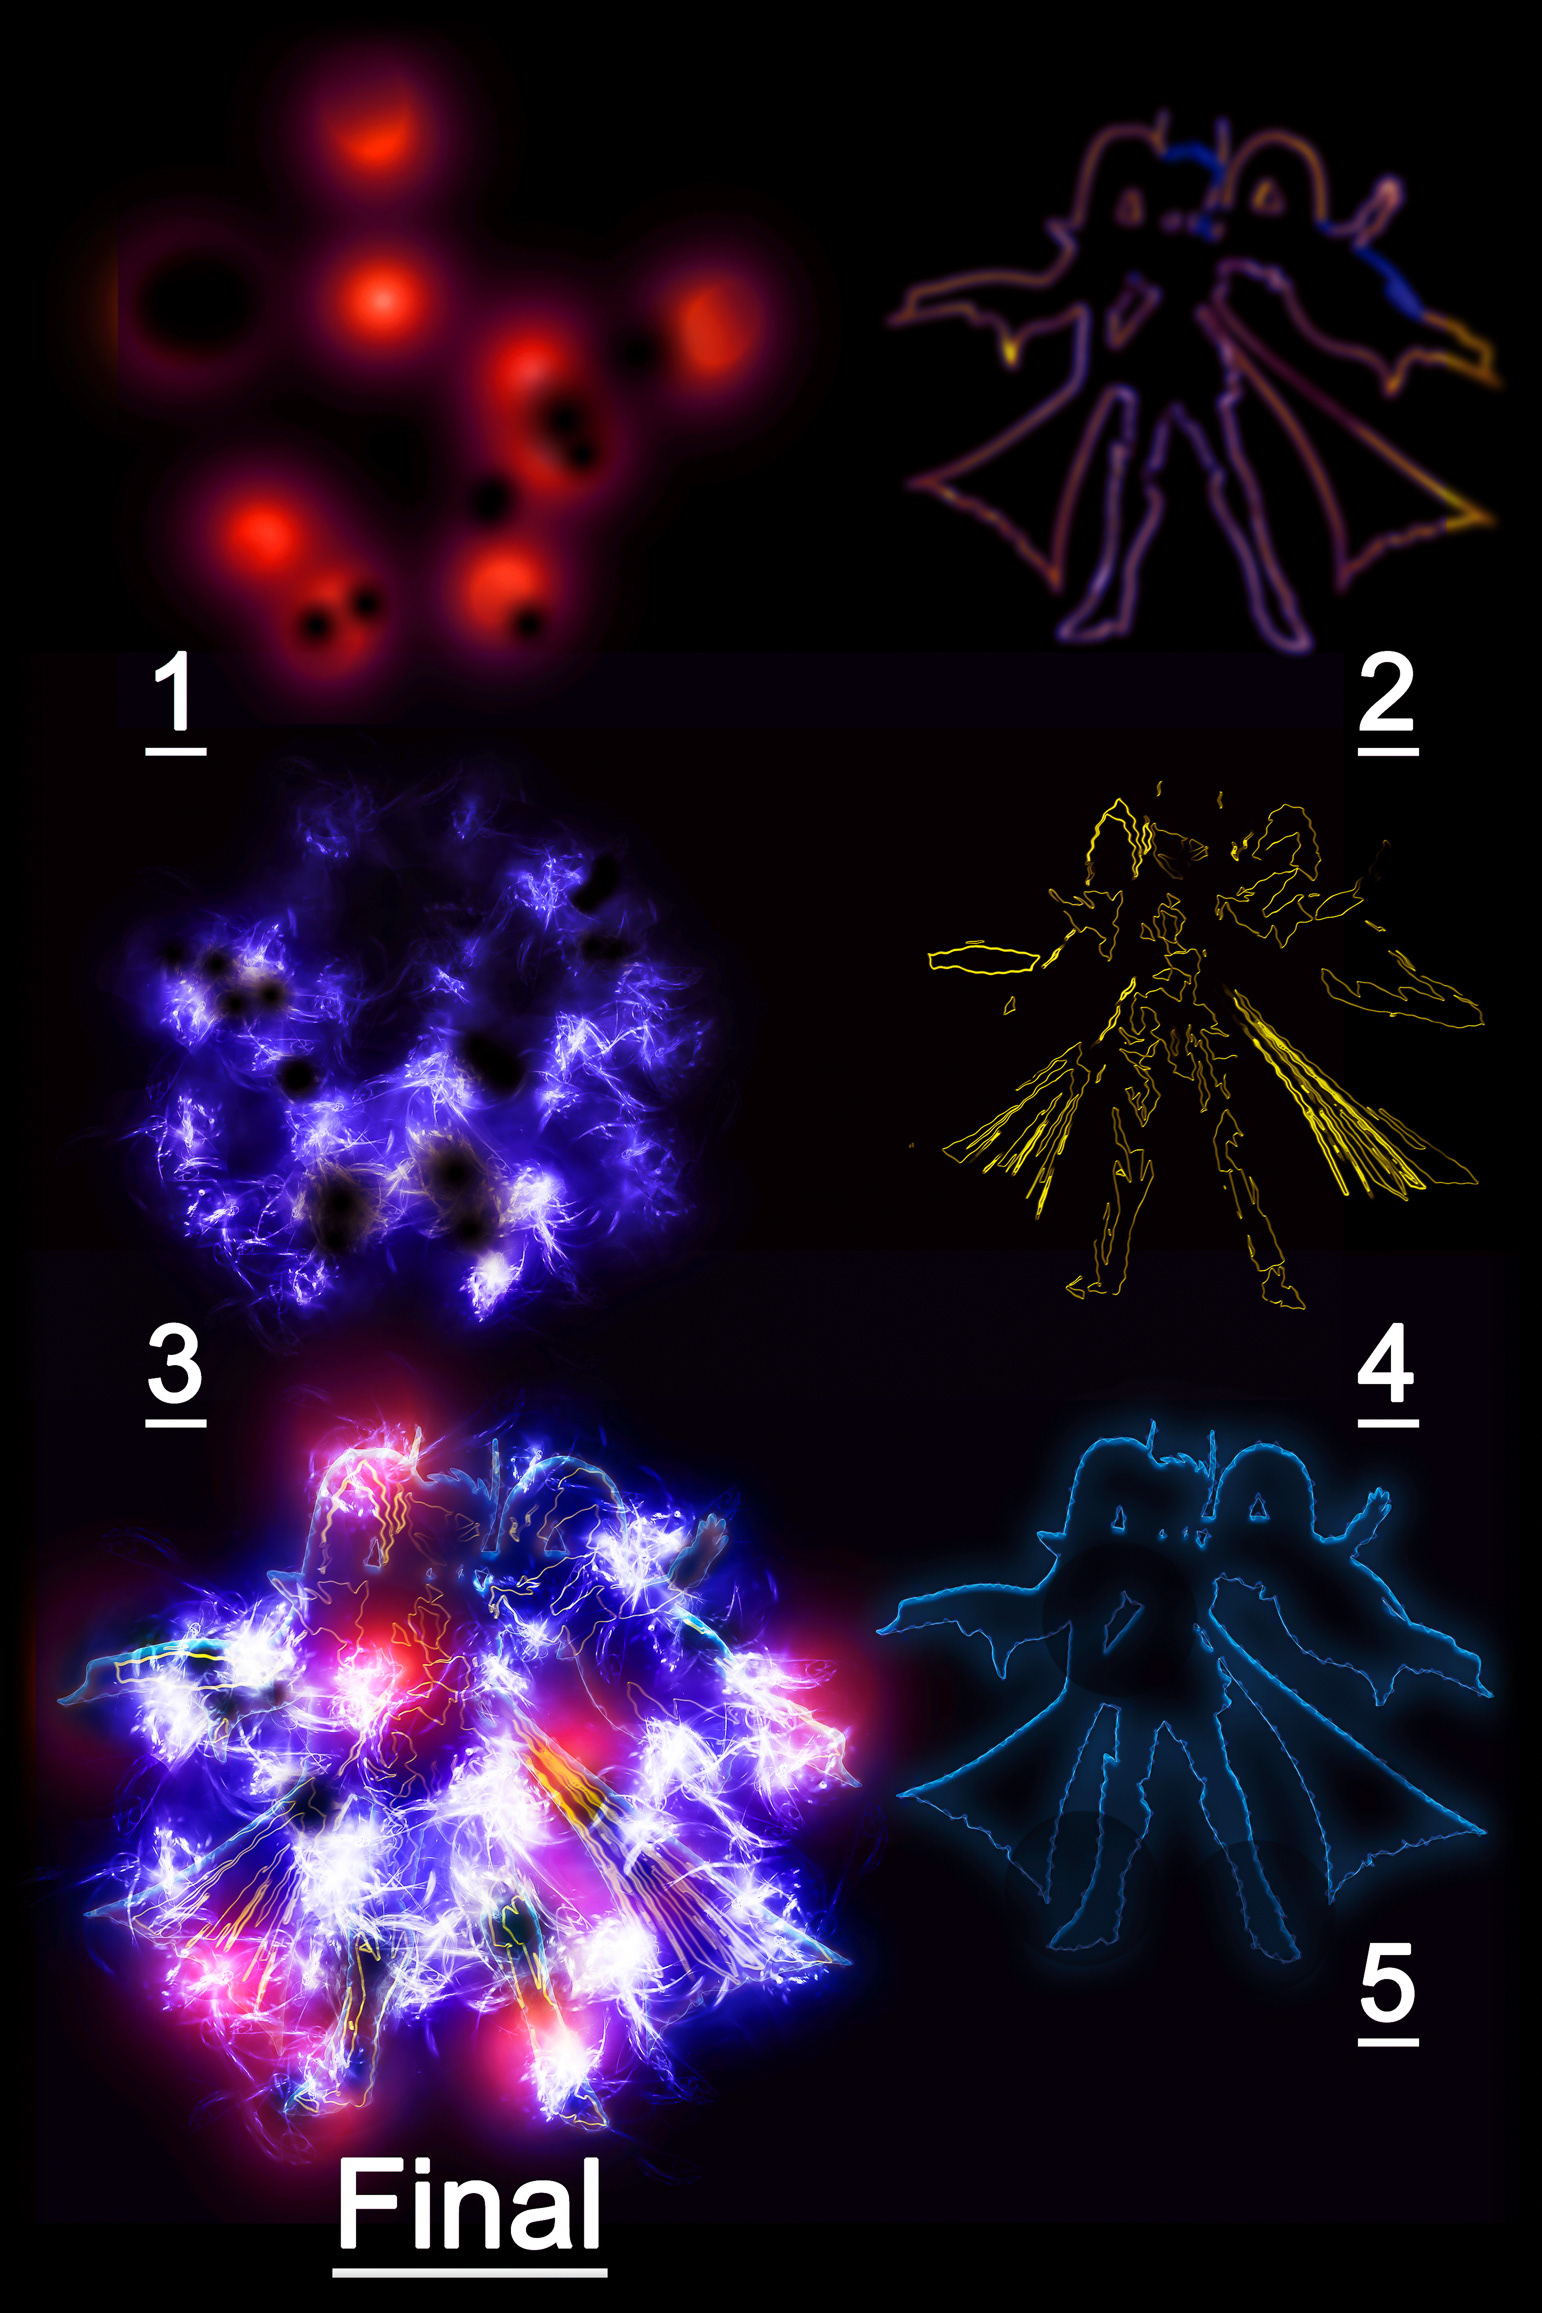
IV. Photobashing processes - foreground - Introduction.
1. Now the tricky part is to create the visual effects.
- Lot of directions and tryouts make impossible to make an immediate result.
- Still different actions free or purchased from graphic rivers are tested, used and applied.
- Scripts can be re-edited and manipulated too into new ones.
2. Please note that the picture canvas size is in 8K resolution (7680 × 4320), sample model is at 300ppi, 8 bit mode (16bit asked too much RAM and Space disk).
- Work is non-destructive (smart filter in order to roll back).
- Background is always in black.
- Thus we have a better perception of the different blend effects for the layers.
3. In order to create methodically, the idea is to try two or three actions and re-arrange the layers (or groups of) by playing with different combination of :
- merging layers,
- adding or tuning filters,
- masking part of layers,
- clipping filters or layers over layers,
- blending
- trying different order of group of layers
- etc.
3.1. The actions used are the following :"Plasma Photoshop Action" from "Eugene-Design"
3.2. "Energy Photoshop Action" from "SevenStyles"
3.3. "Ice Nova" from "Black Null"
Thanks for their wonderful work which is constantly updated.
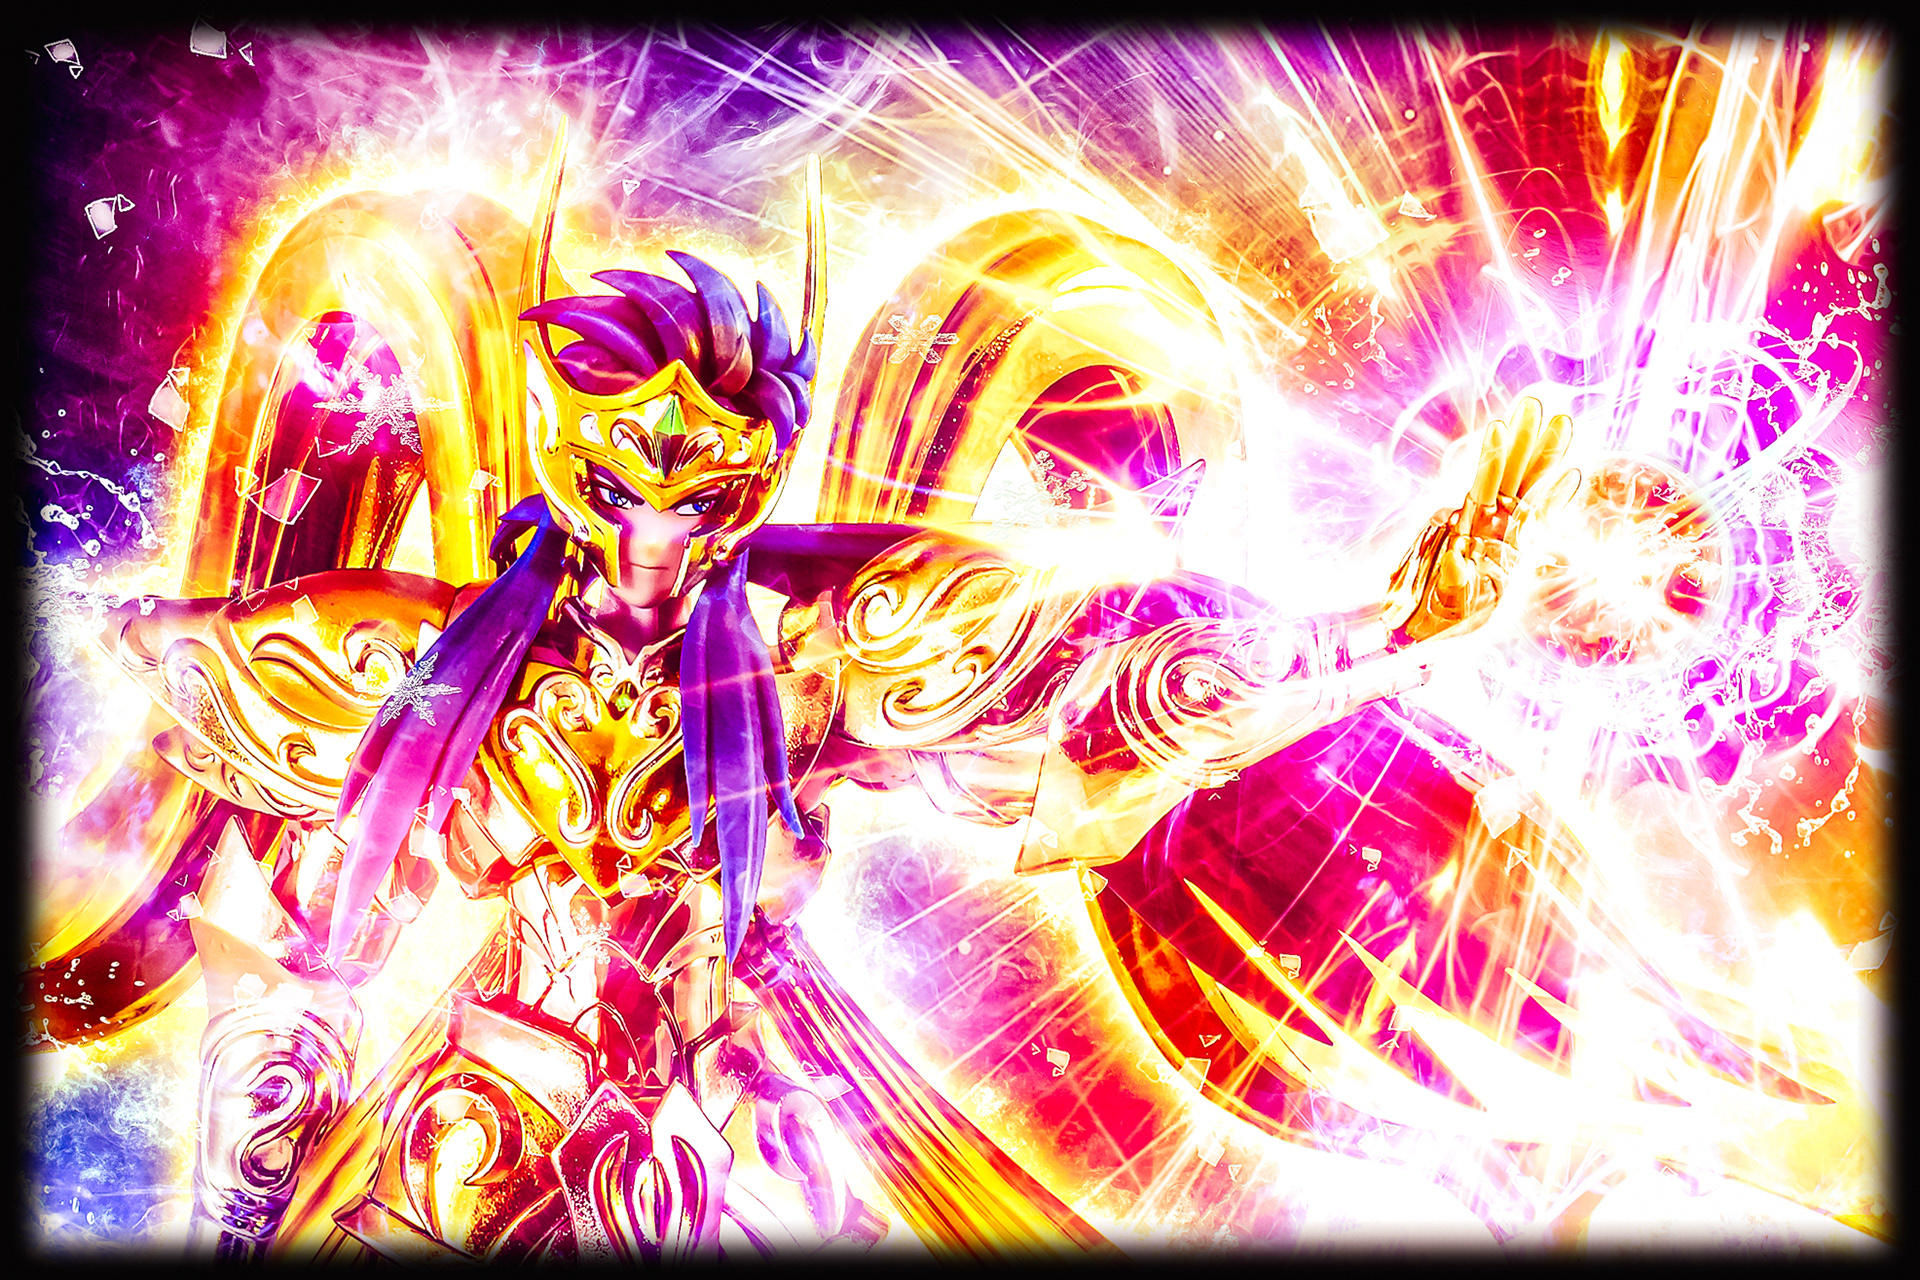
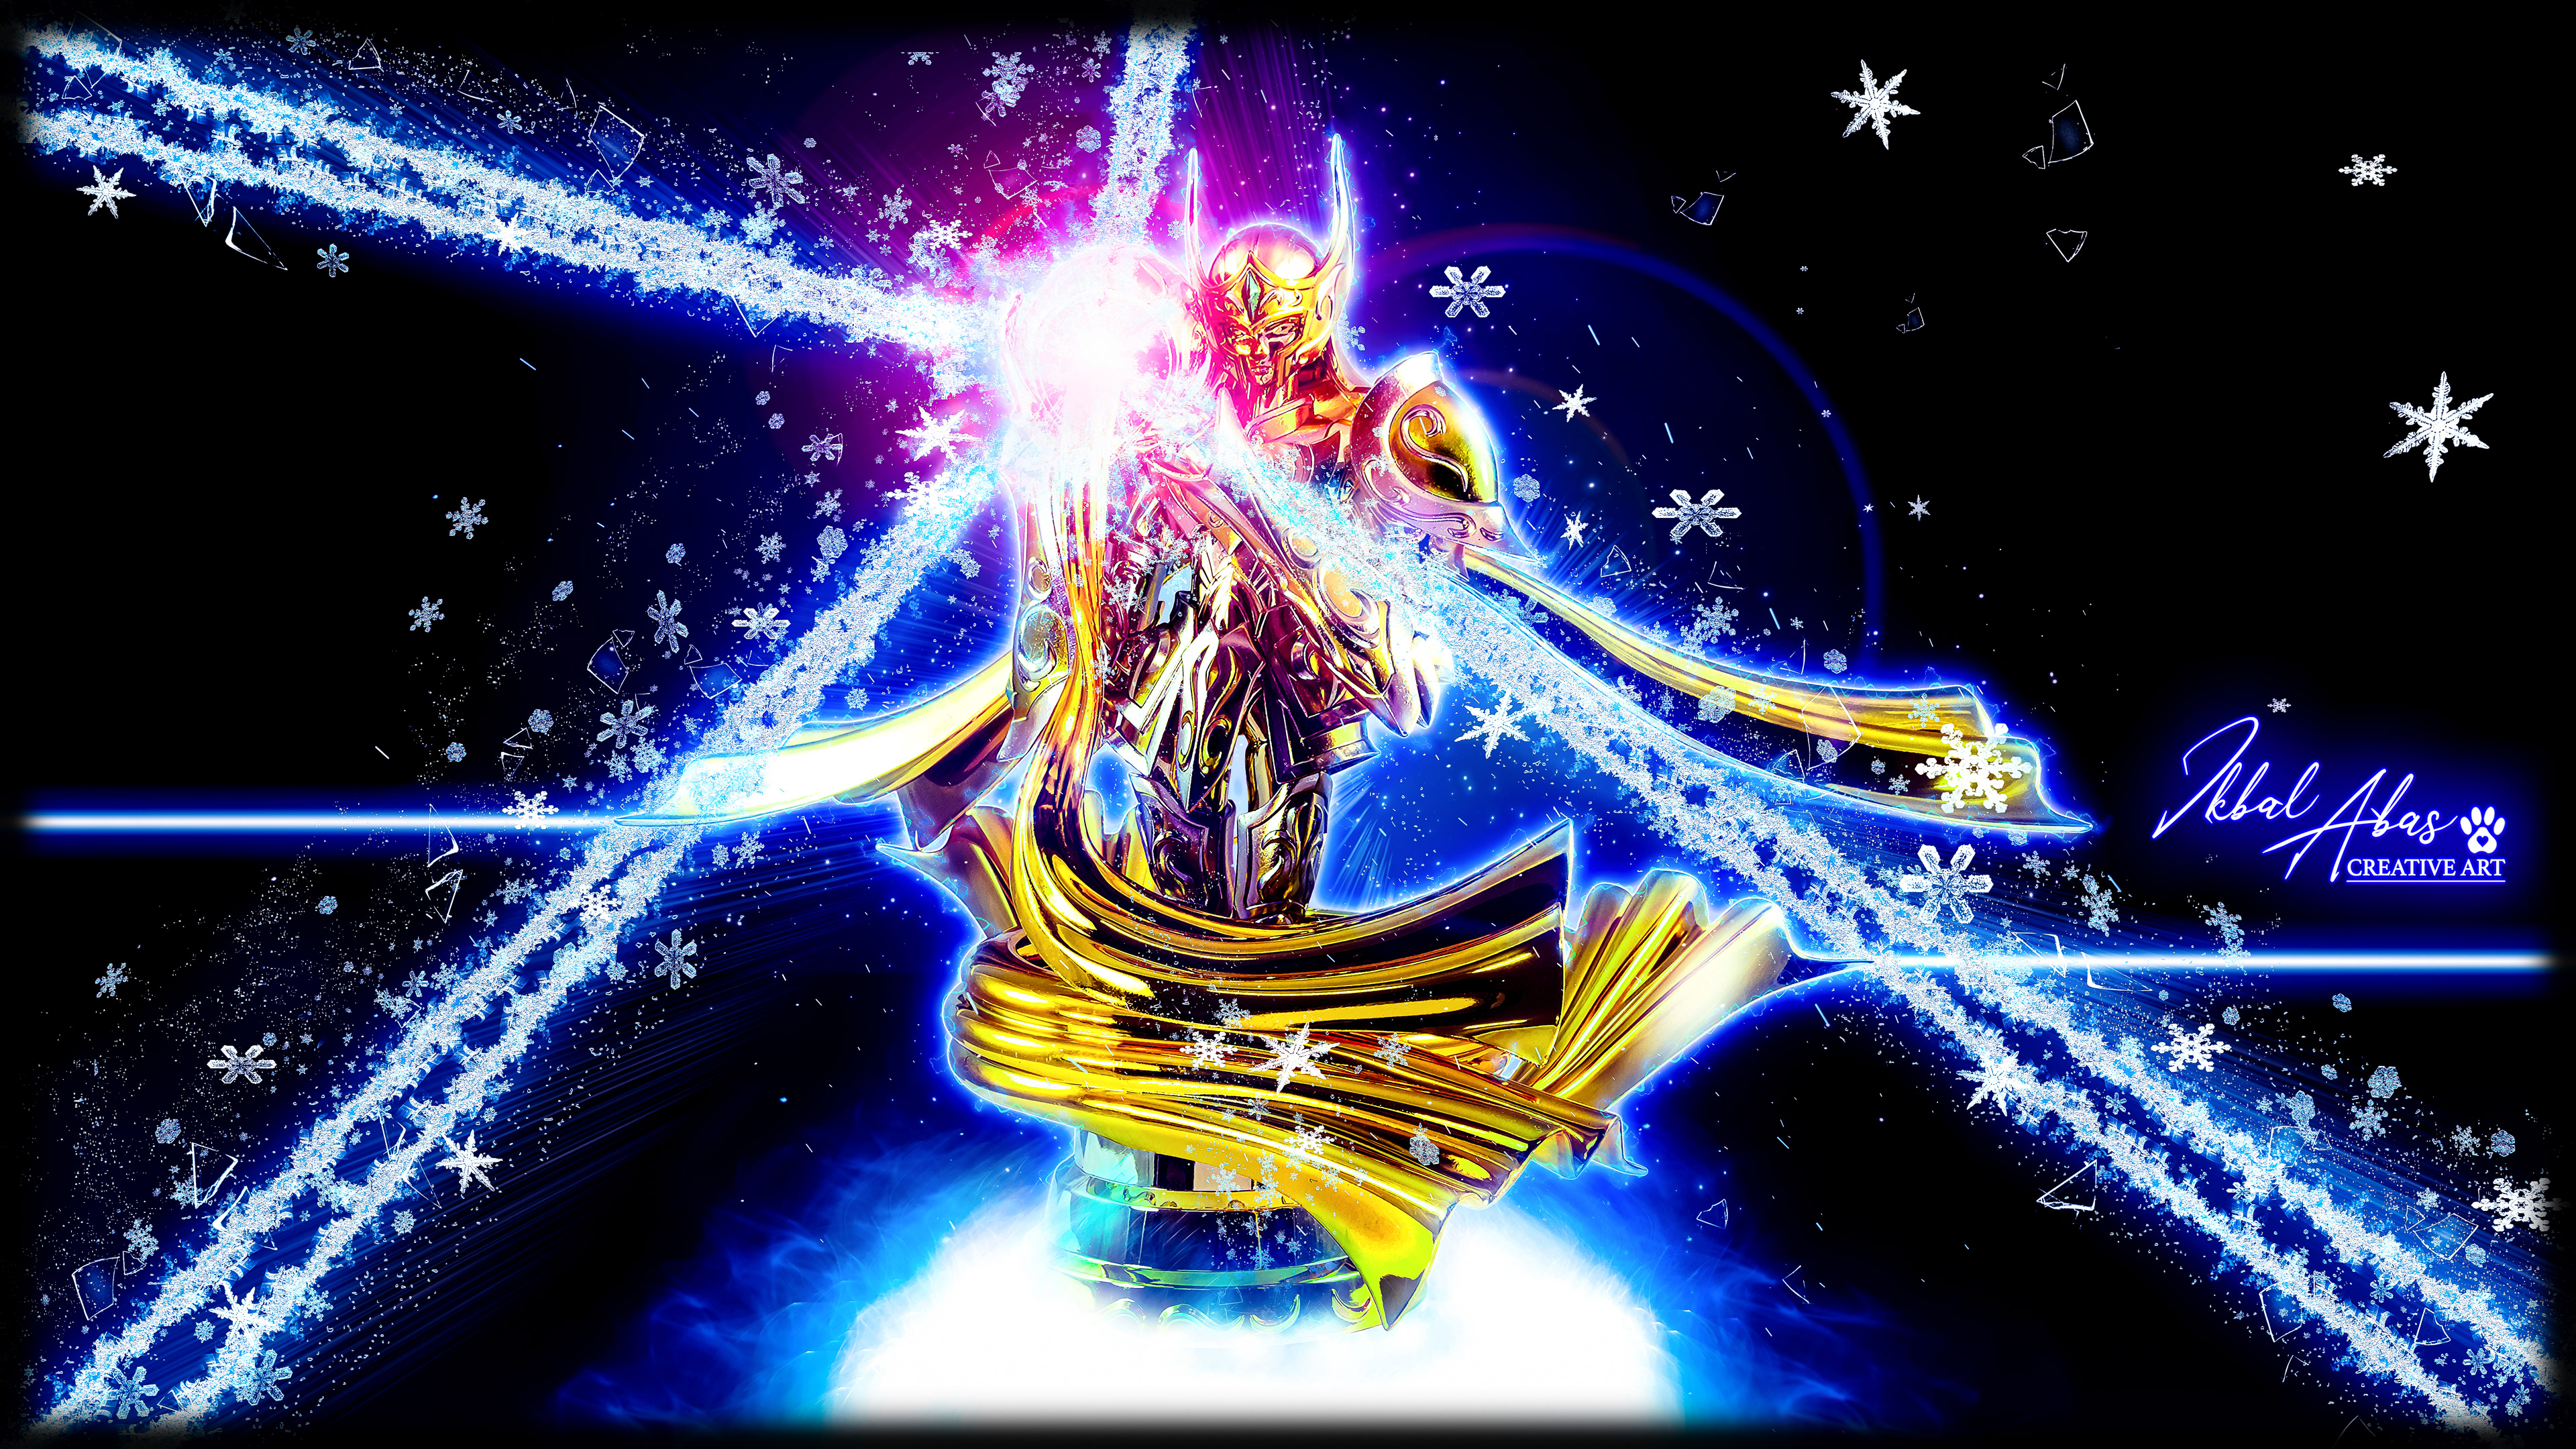
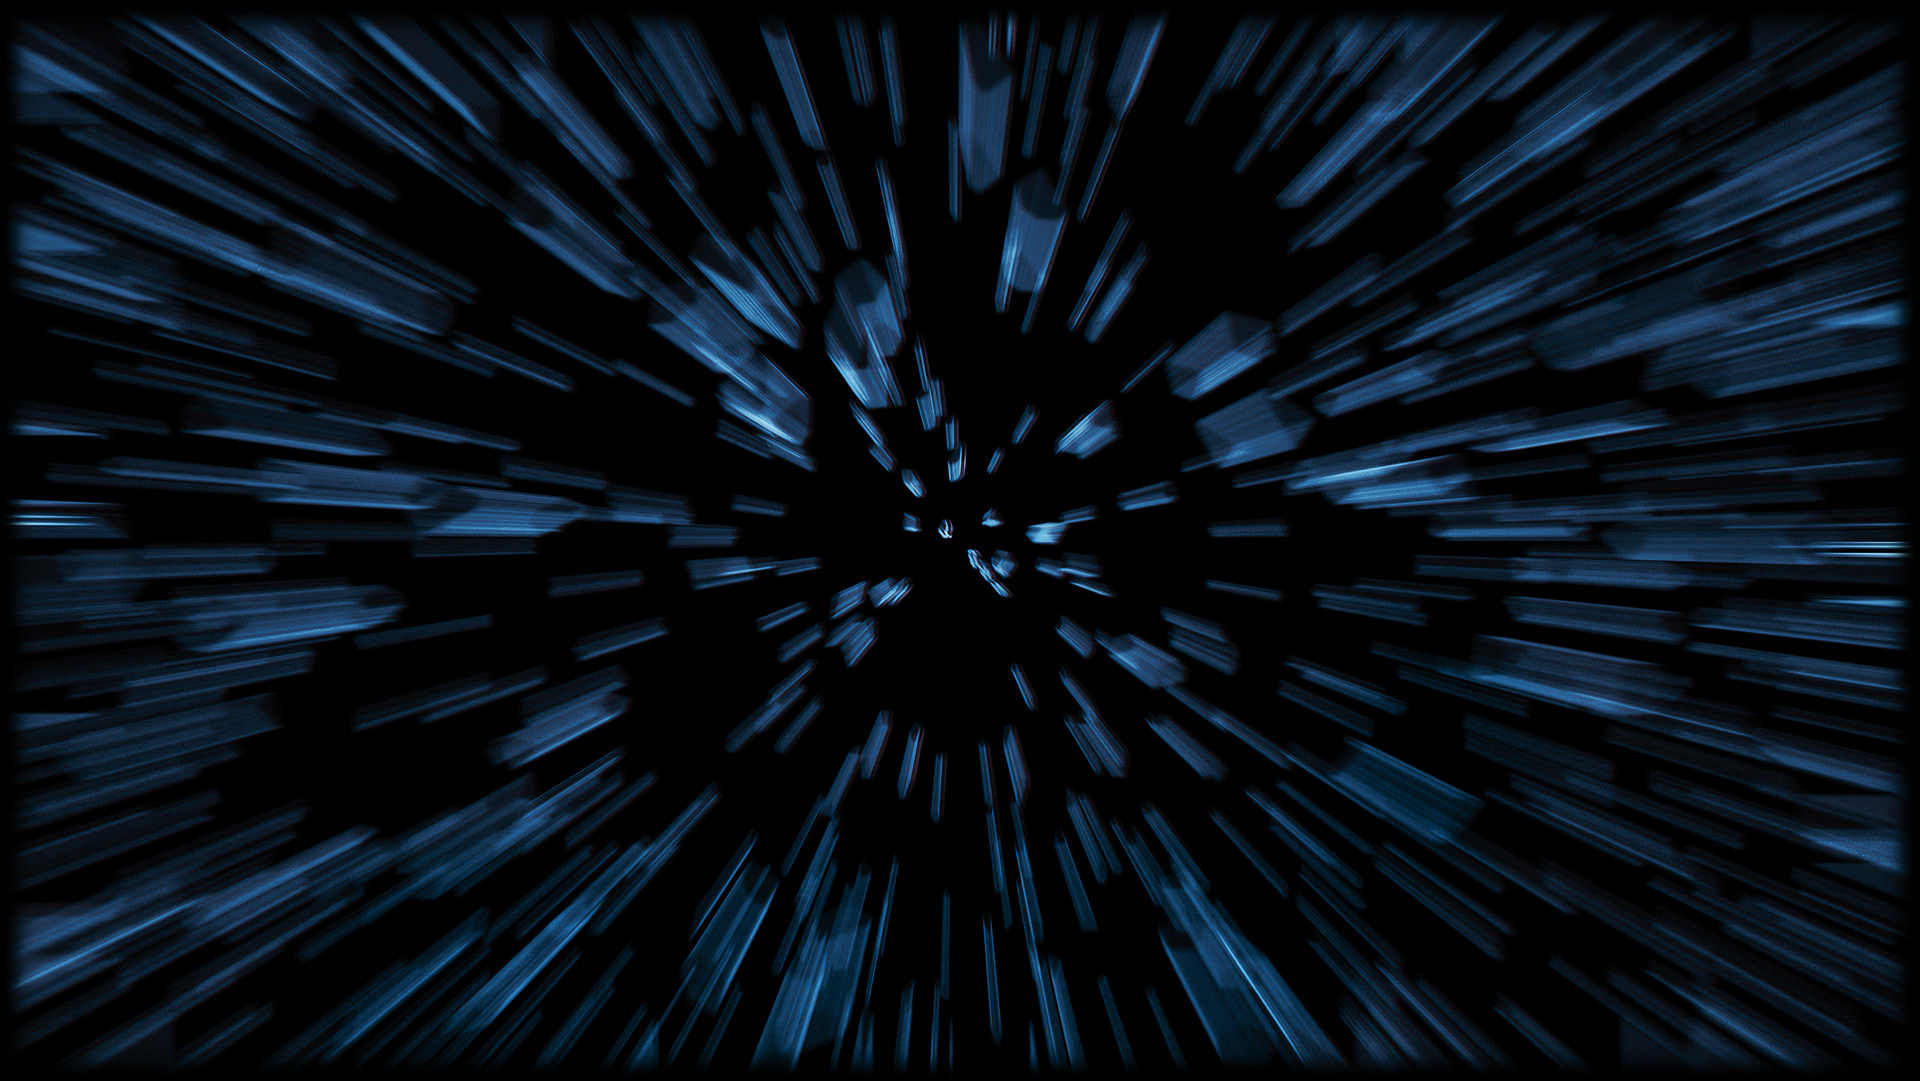
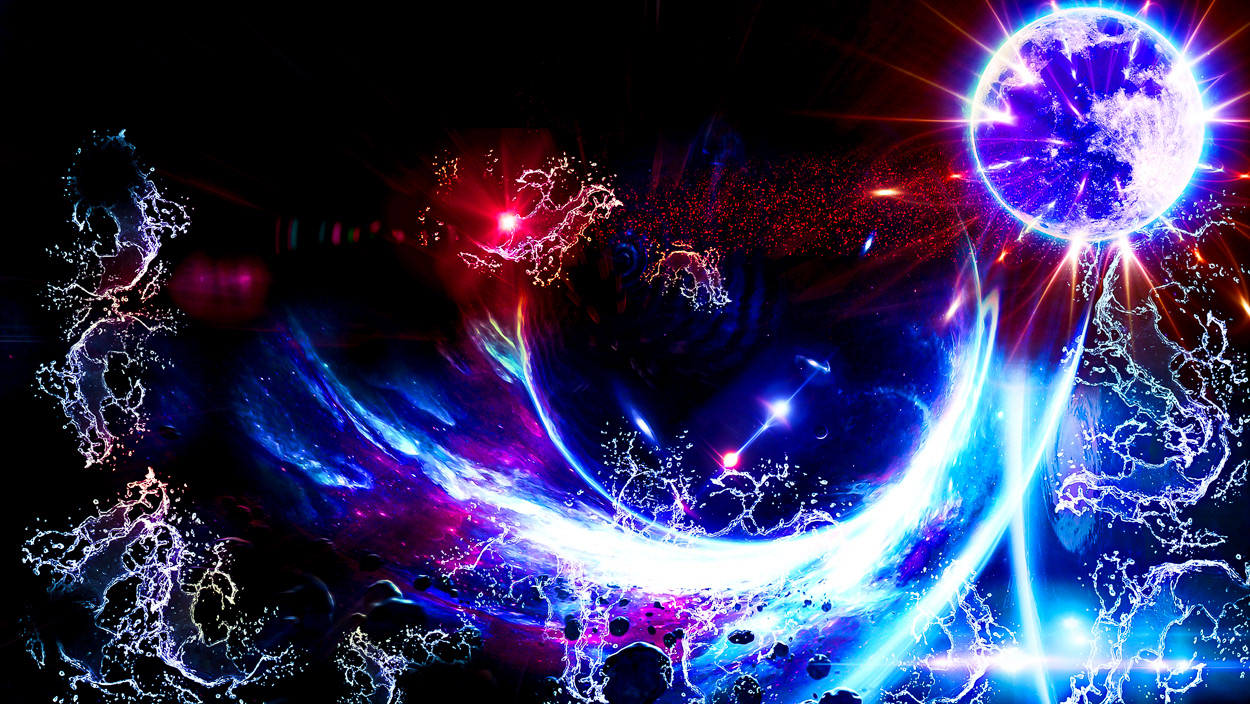
V. Photobashing processes - foreground - Snow Tempest.
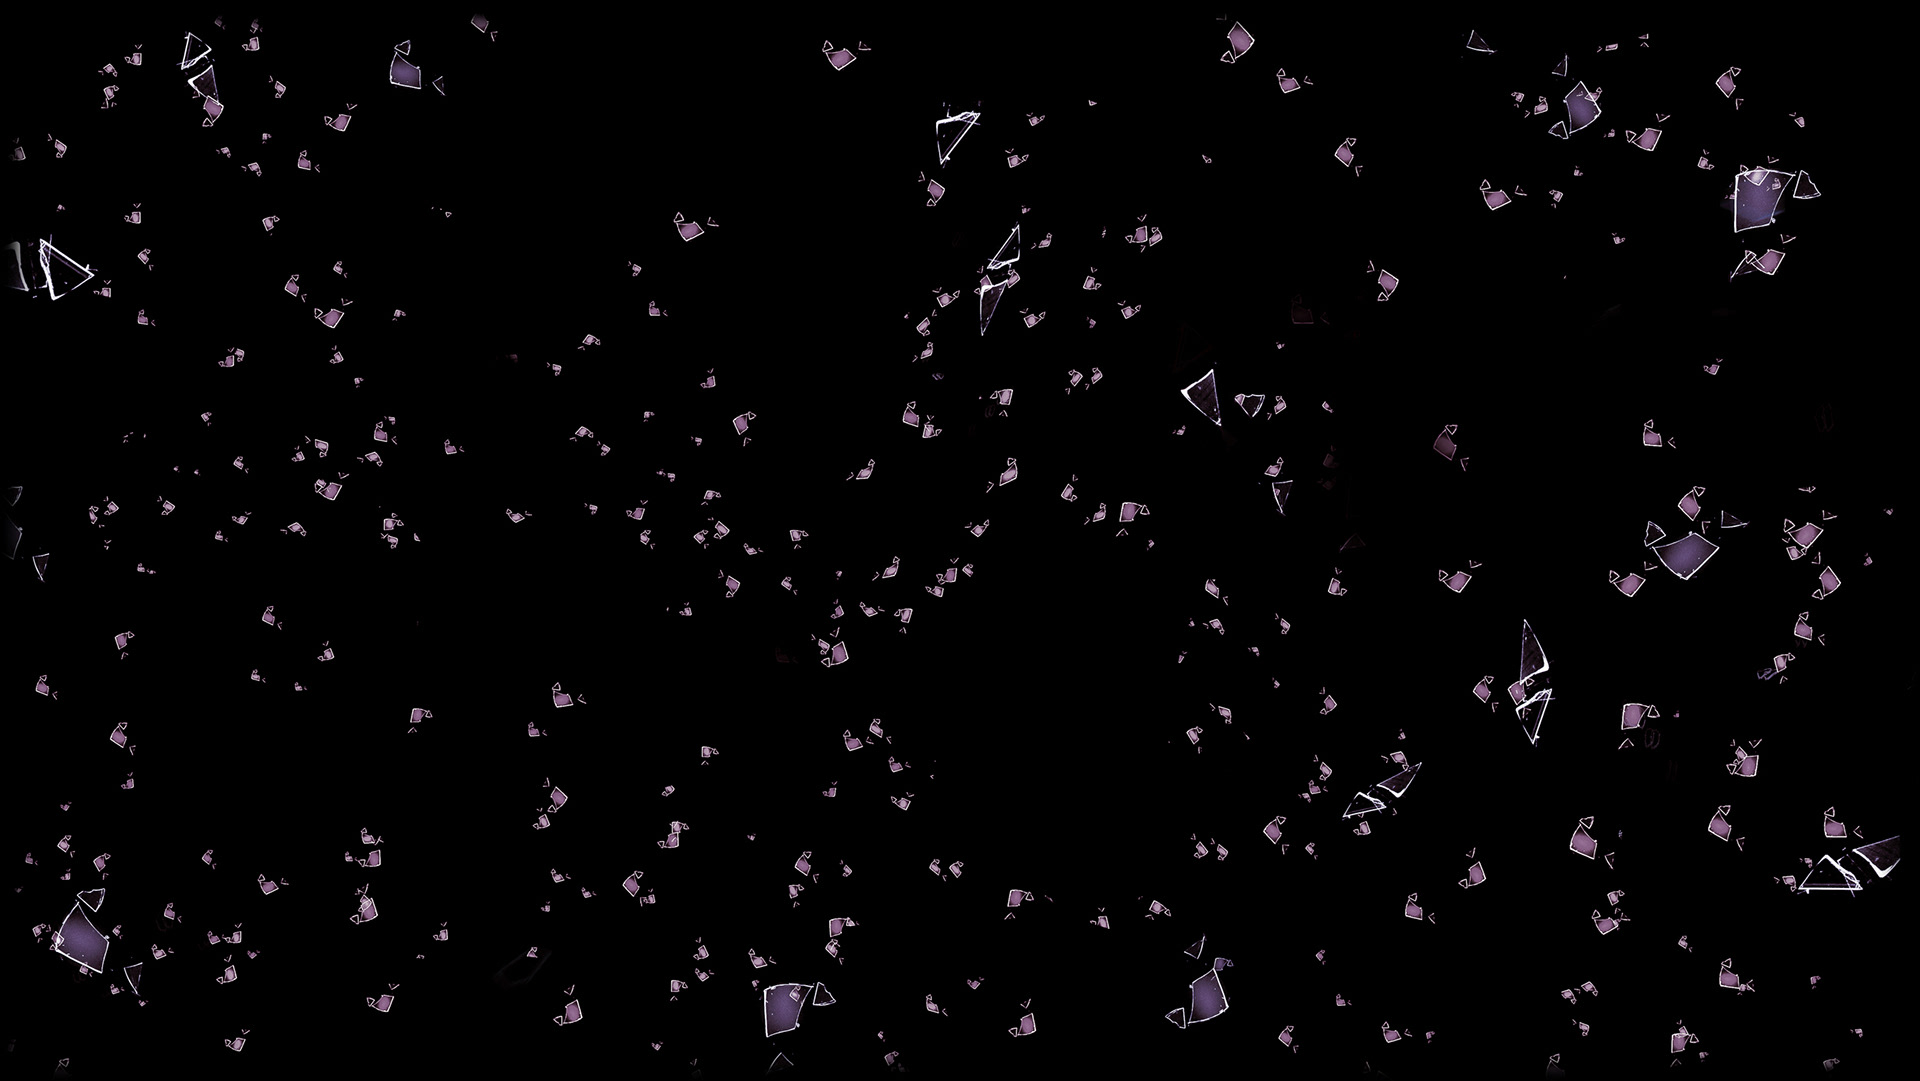


VI. Photobashing processes - foreground - Lights and Ice Effects on Character.
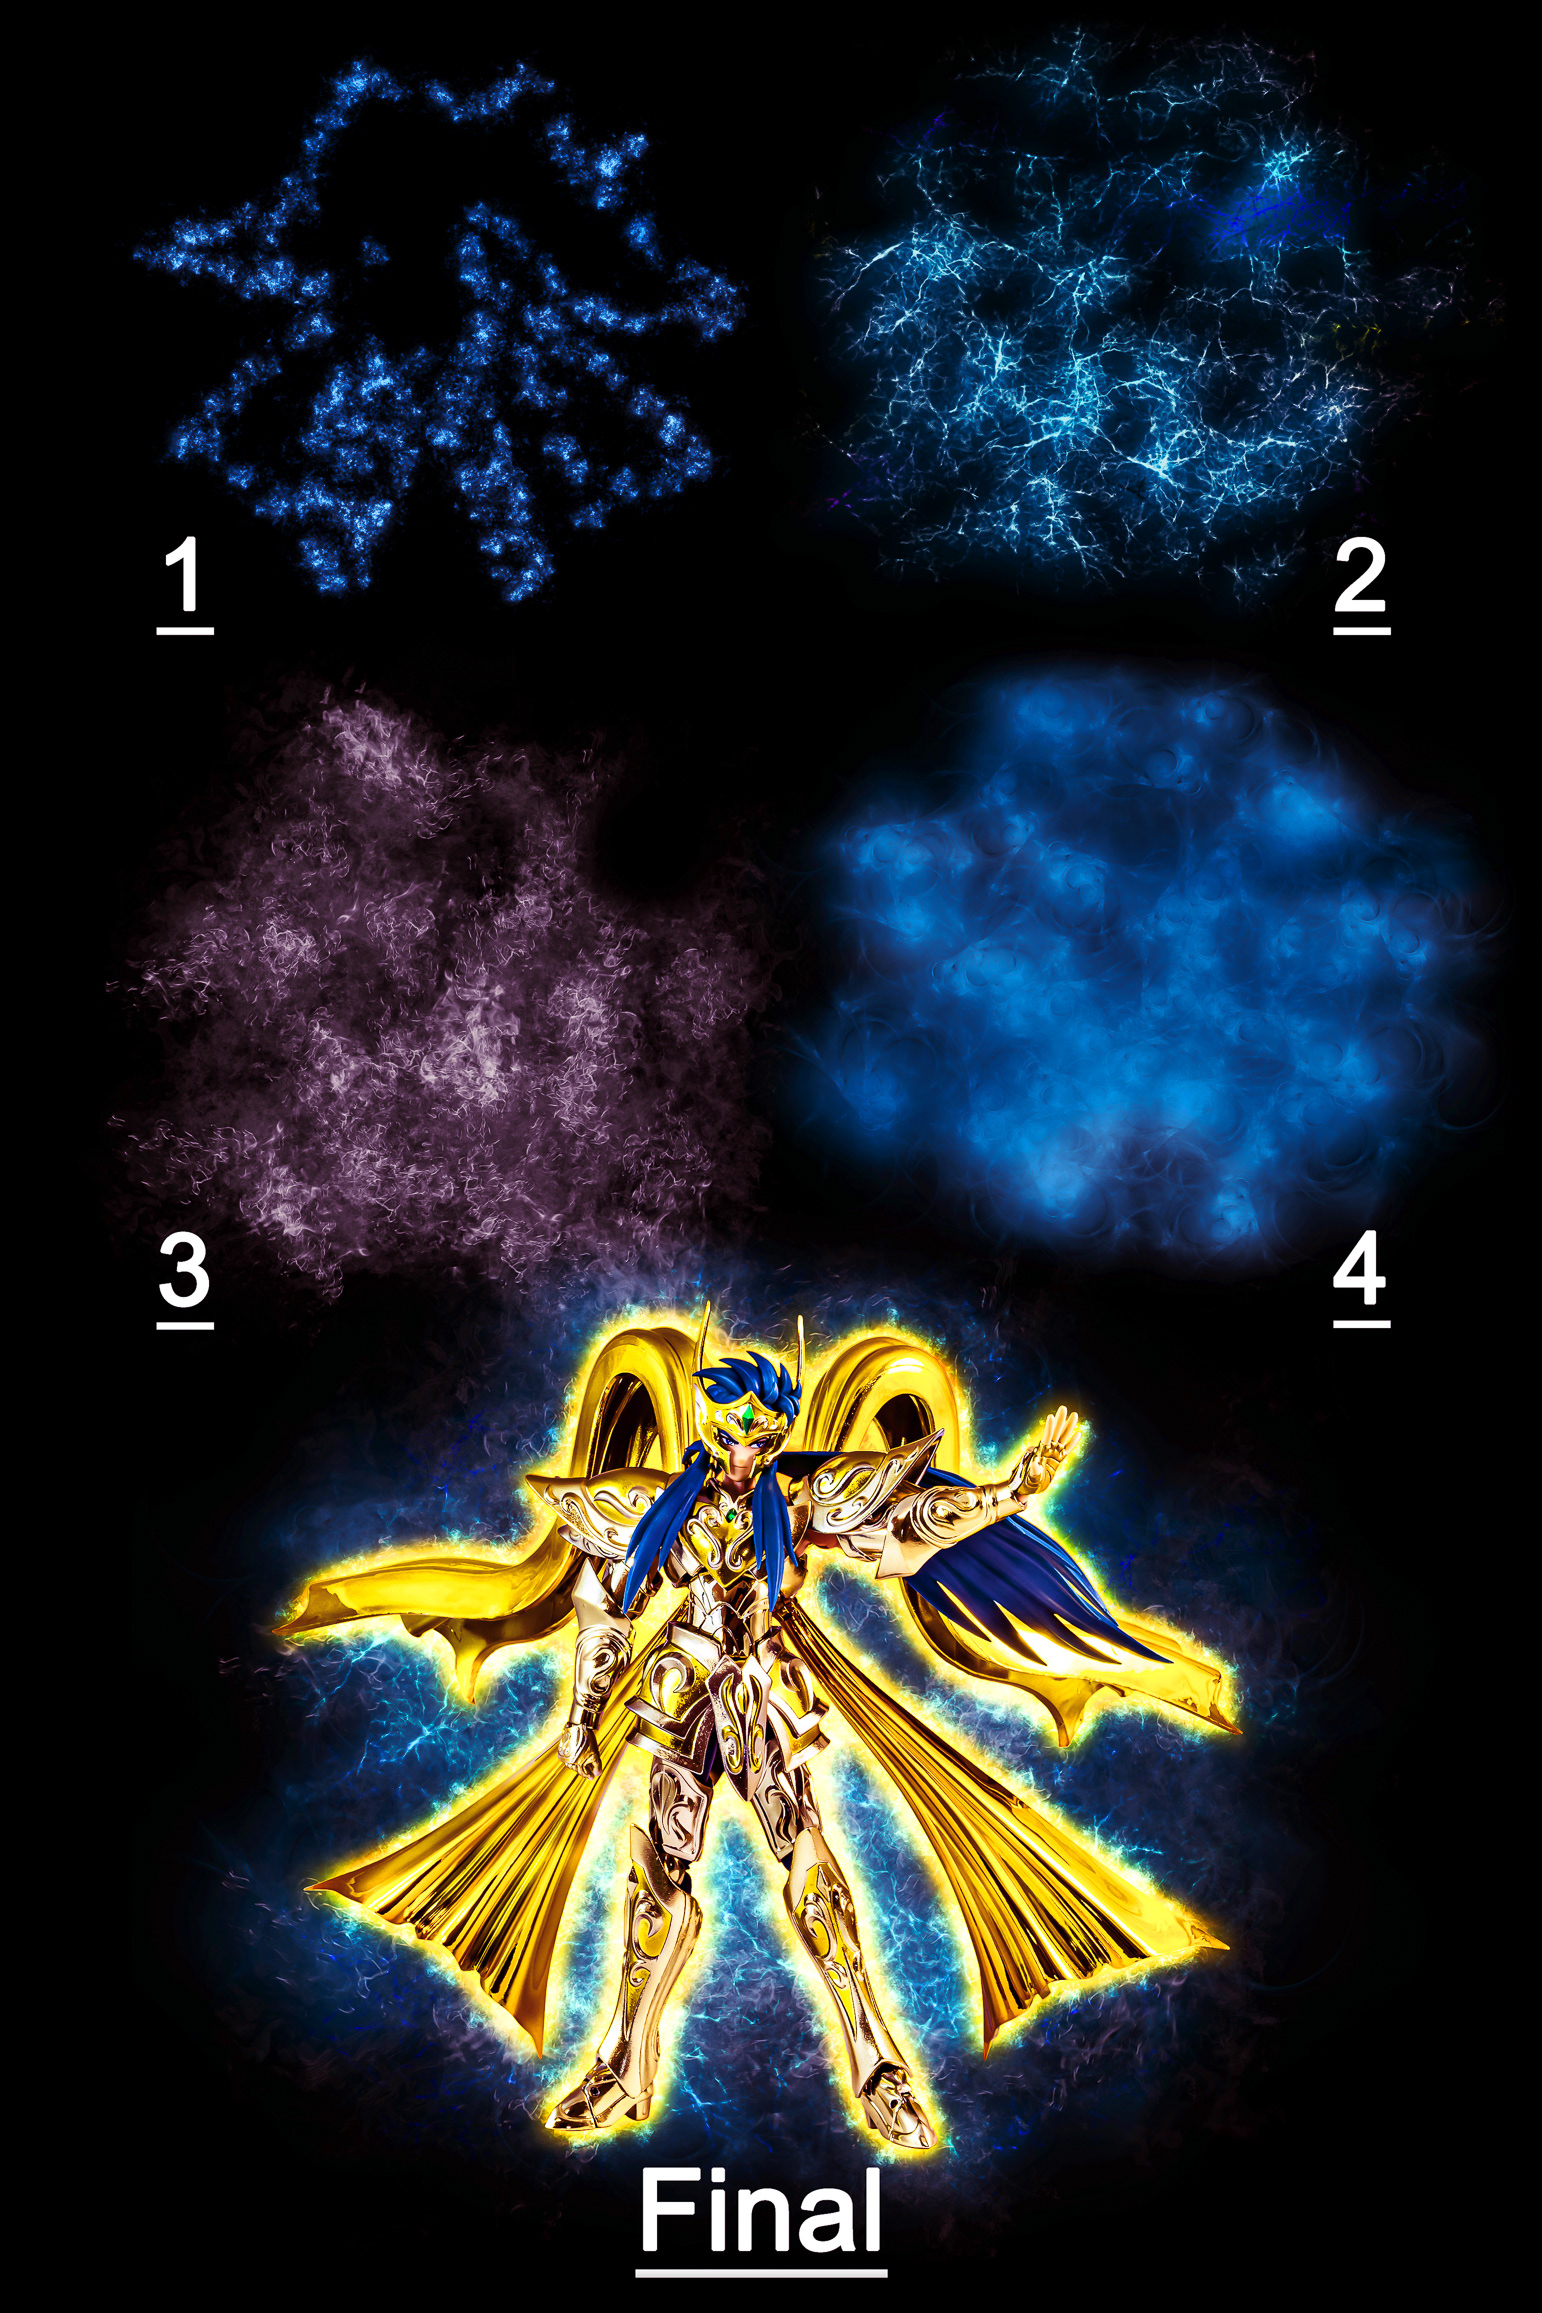
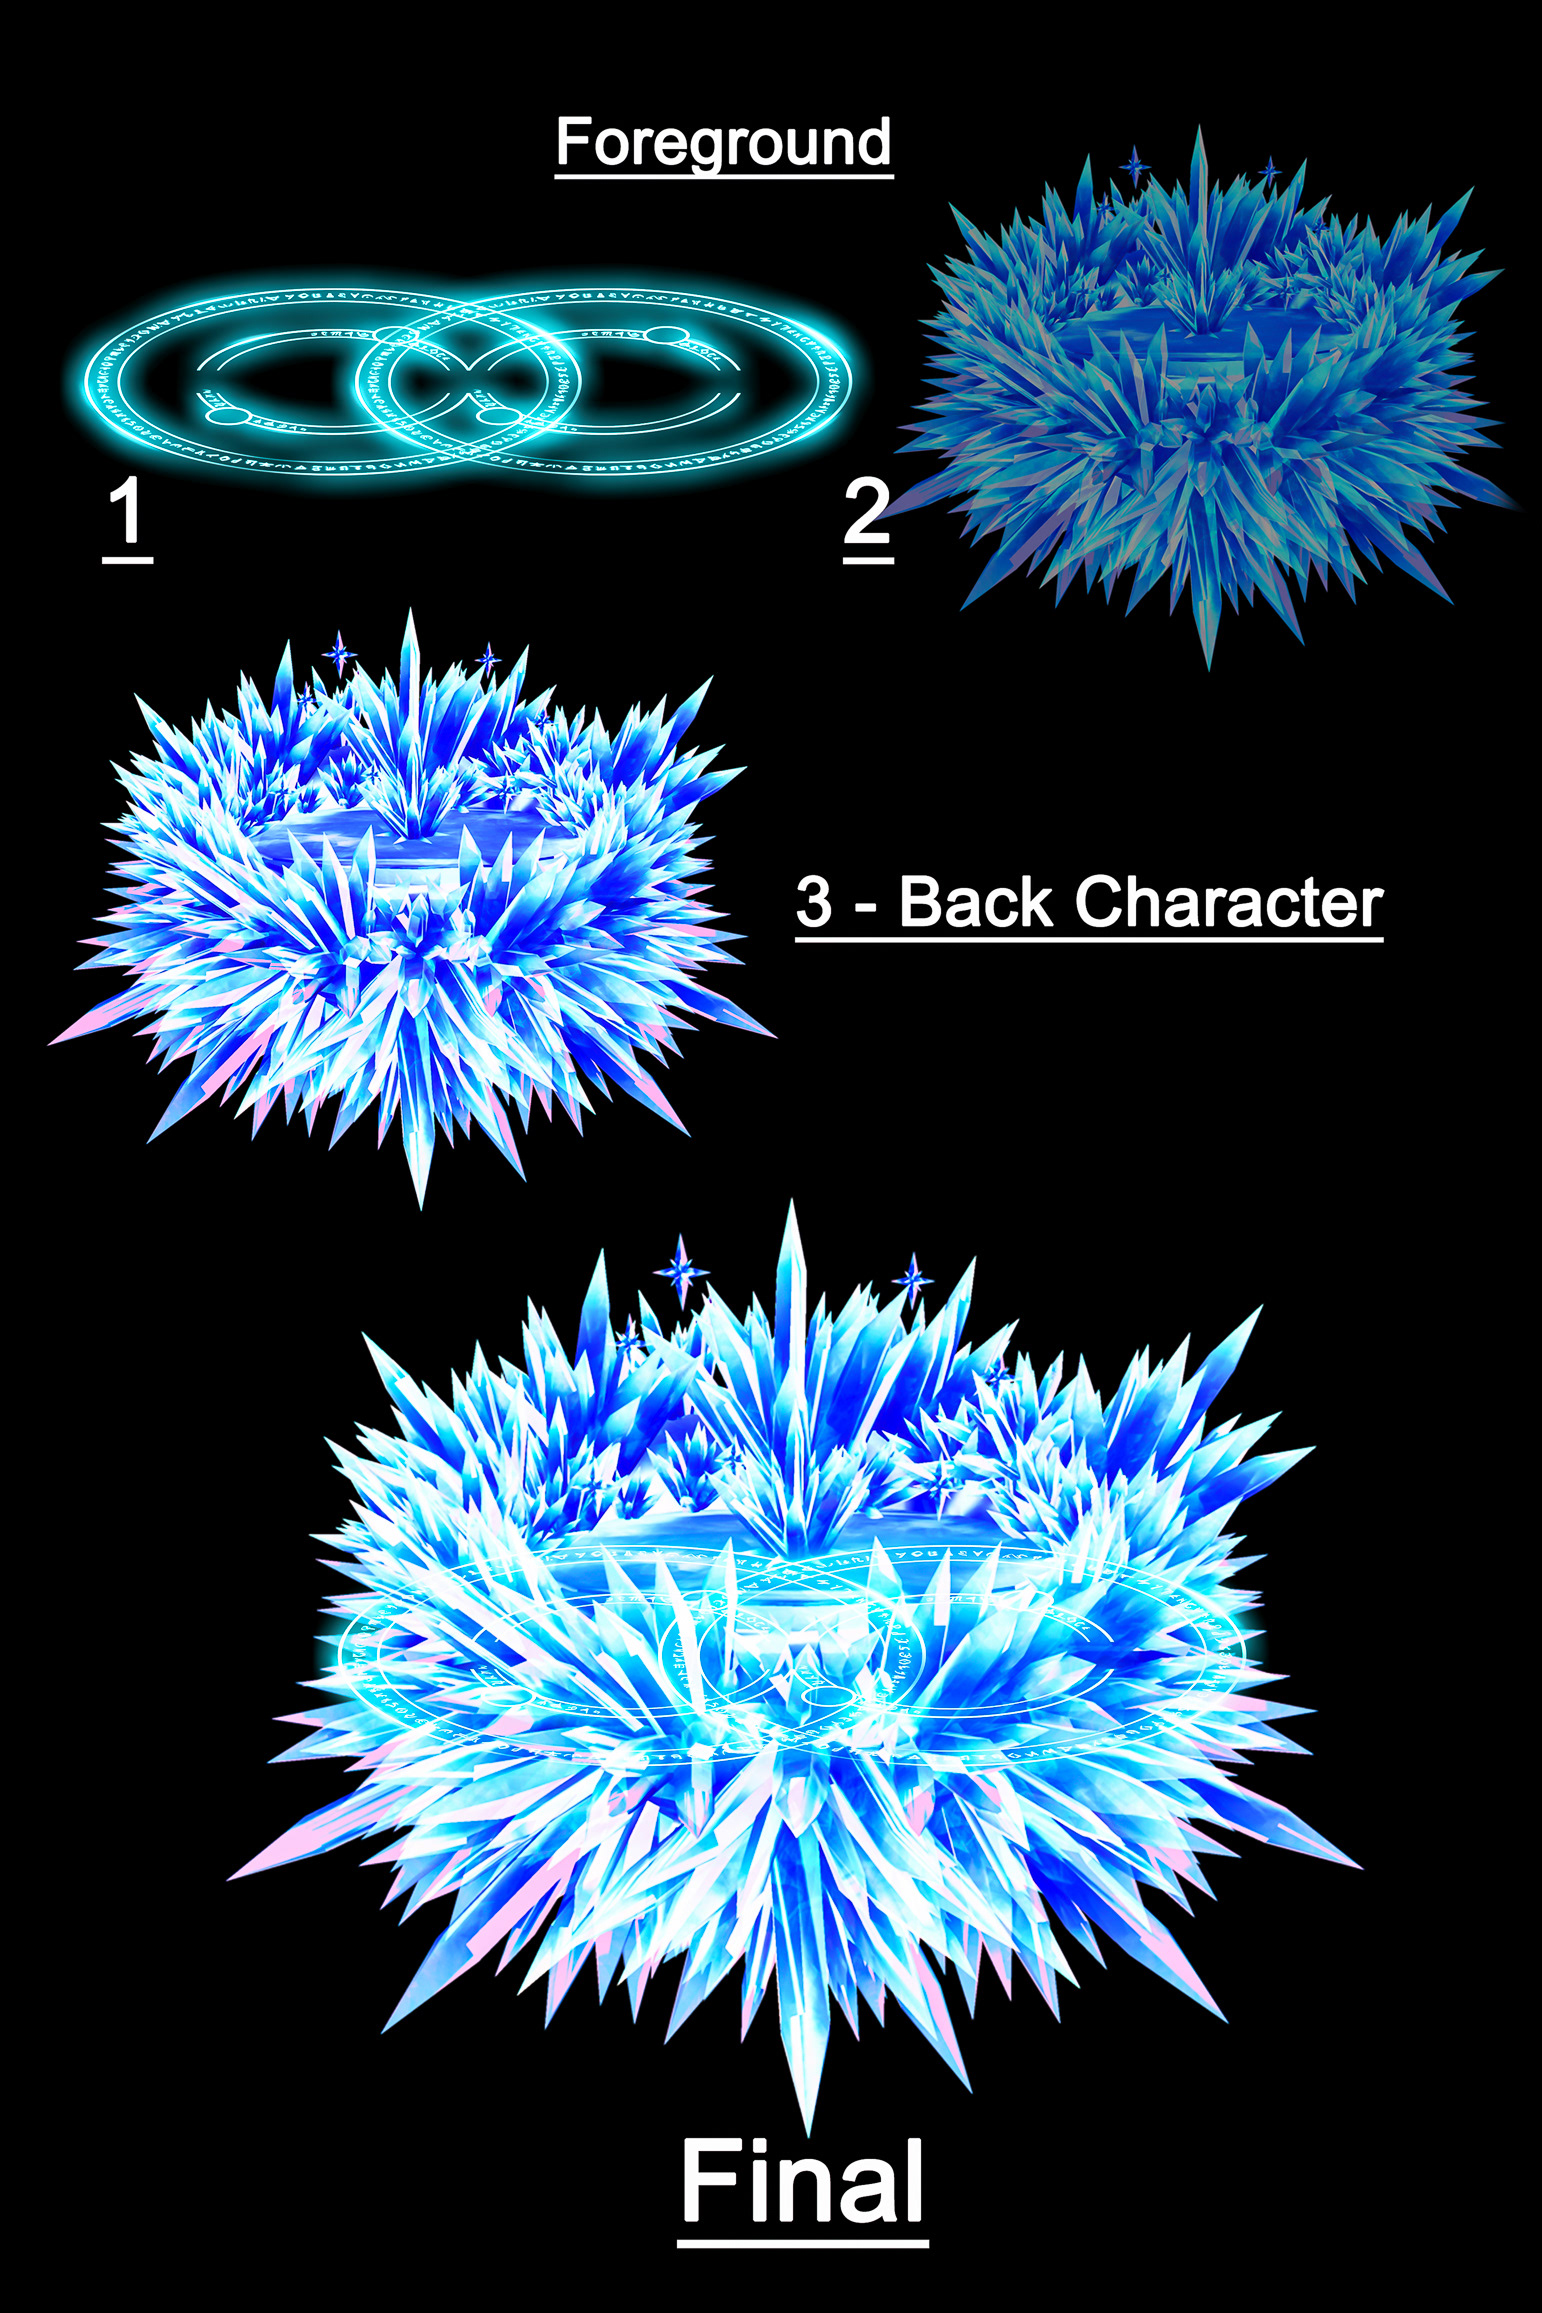
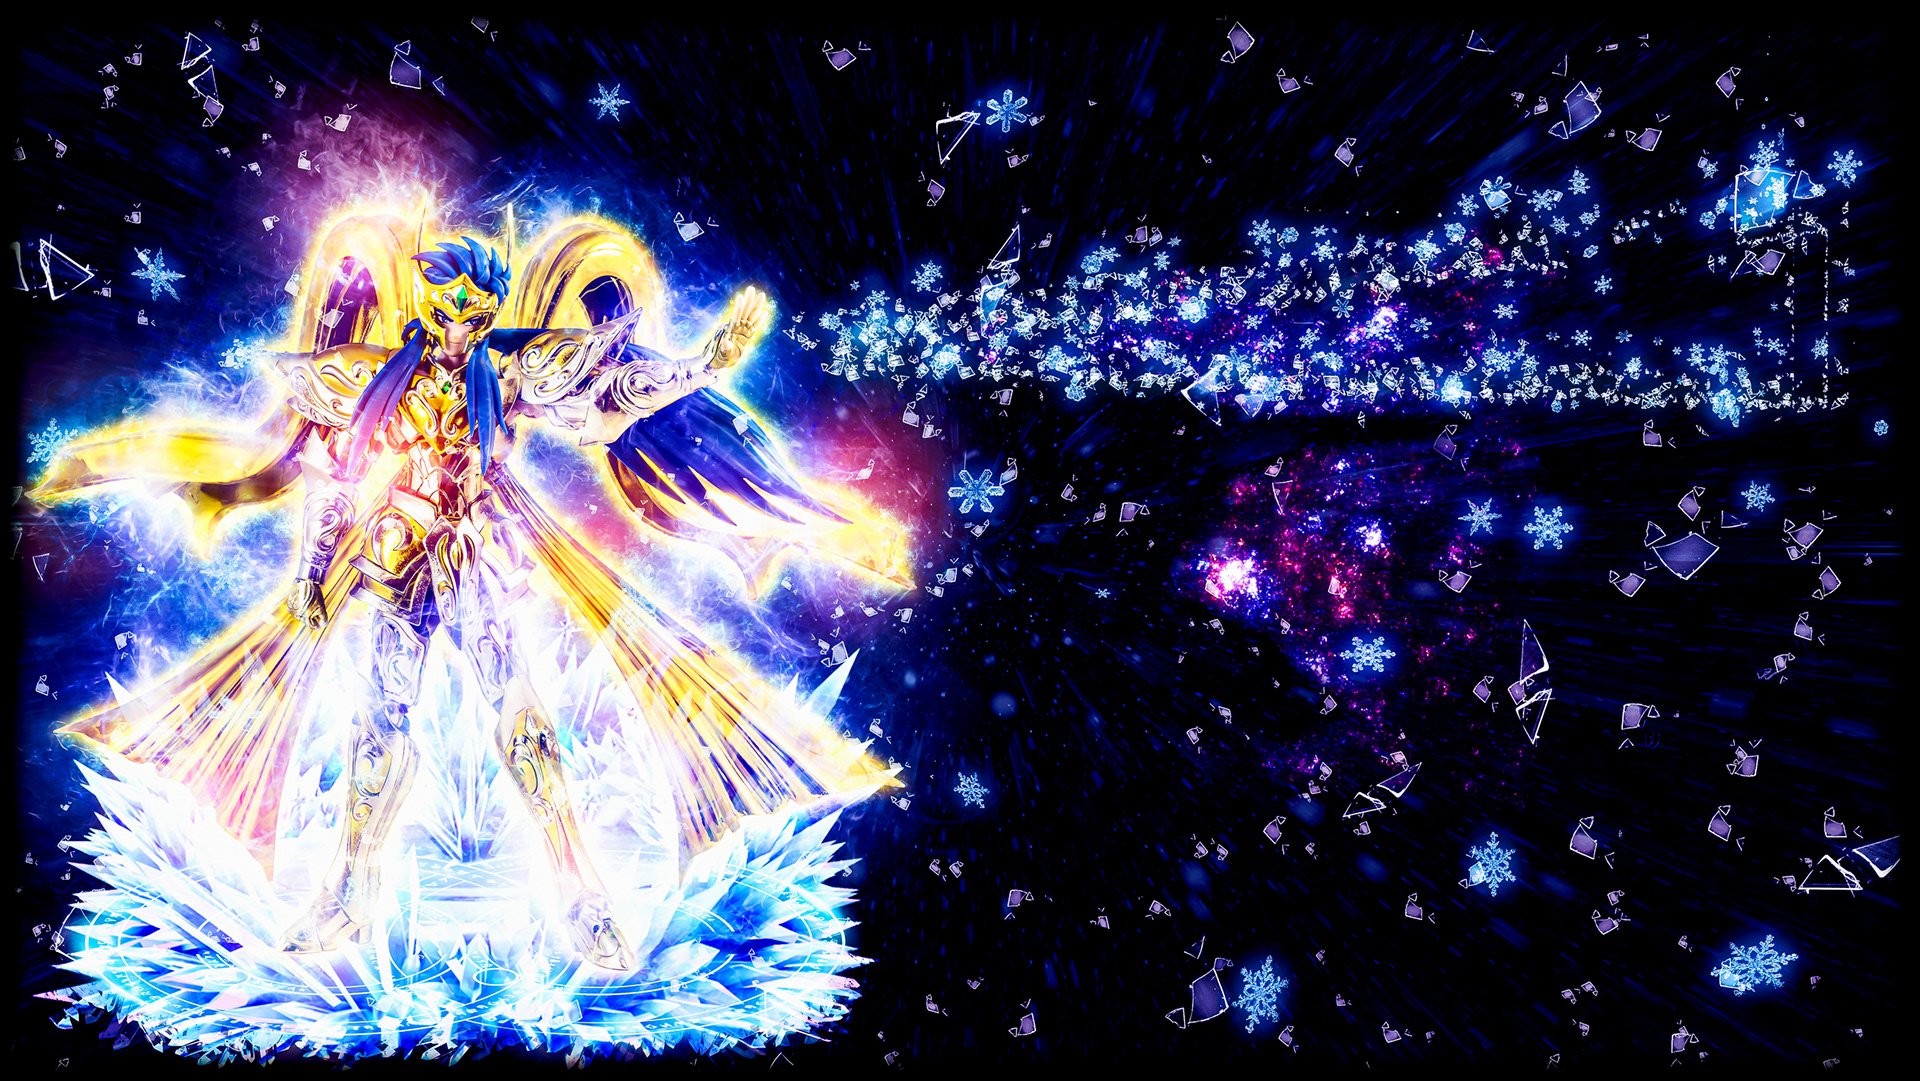
VII. Photobashing processes - foreground - Energy Ball

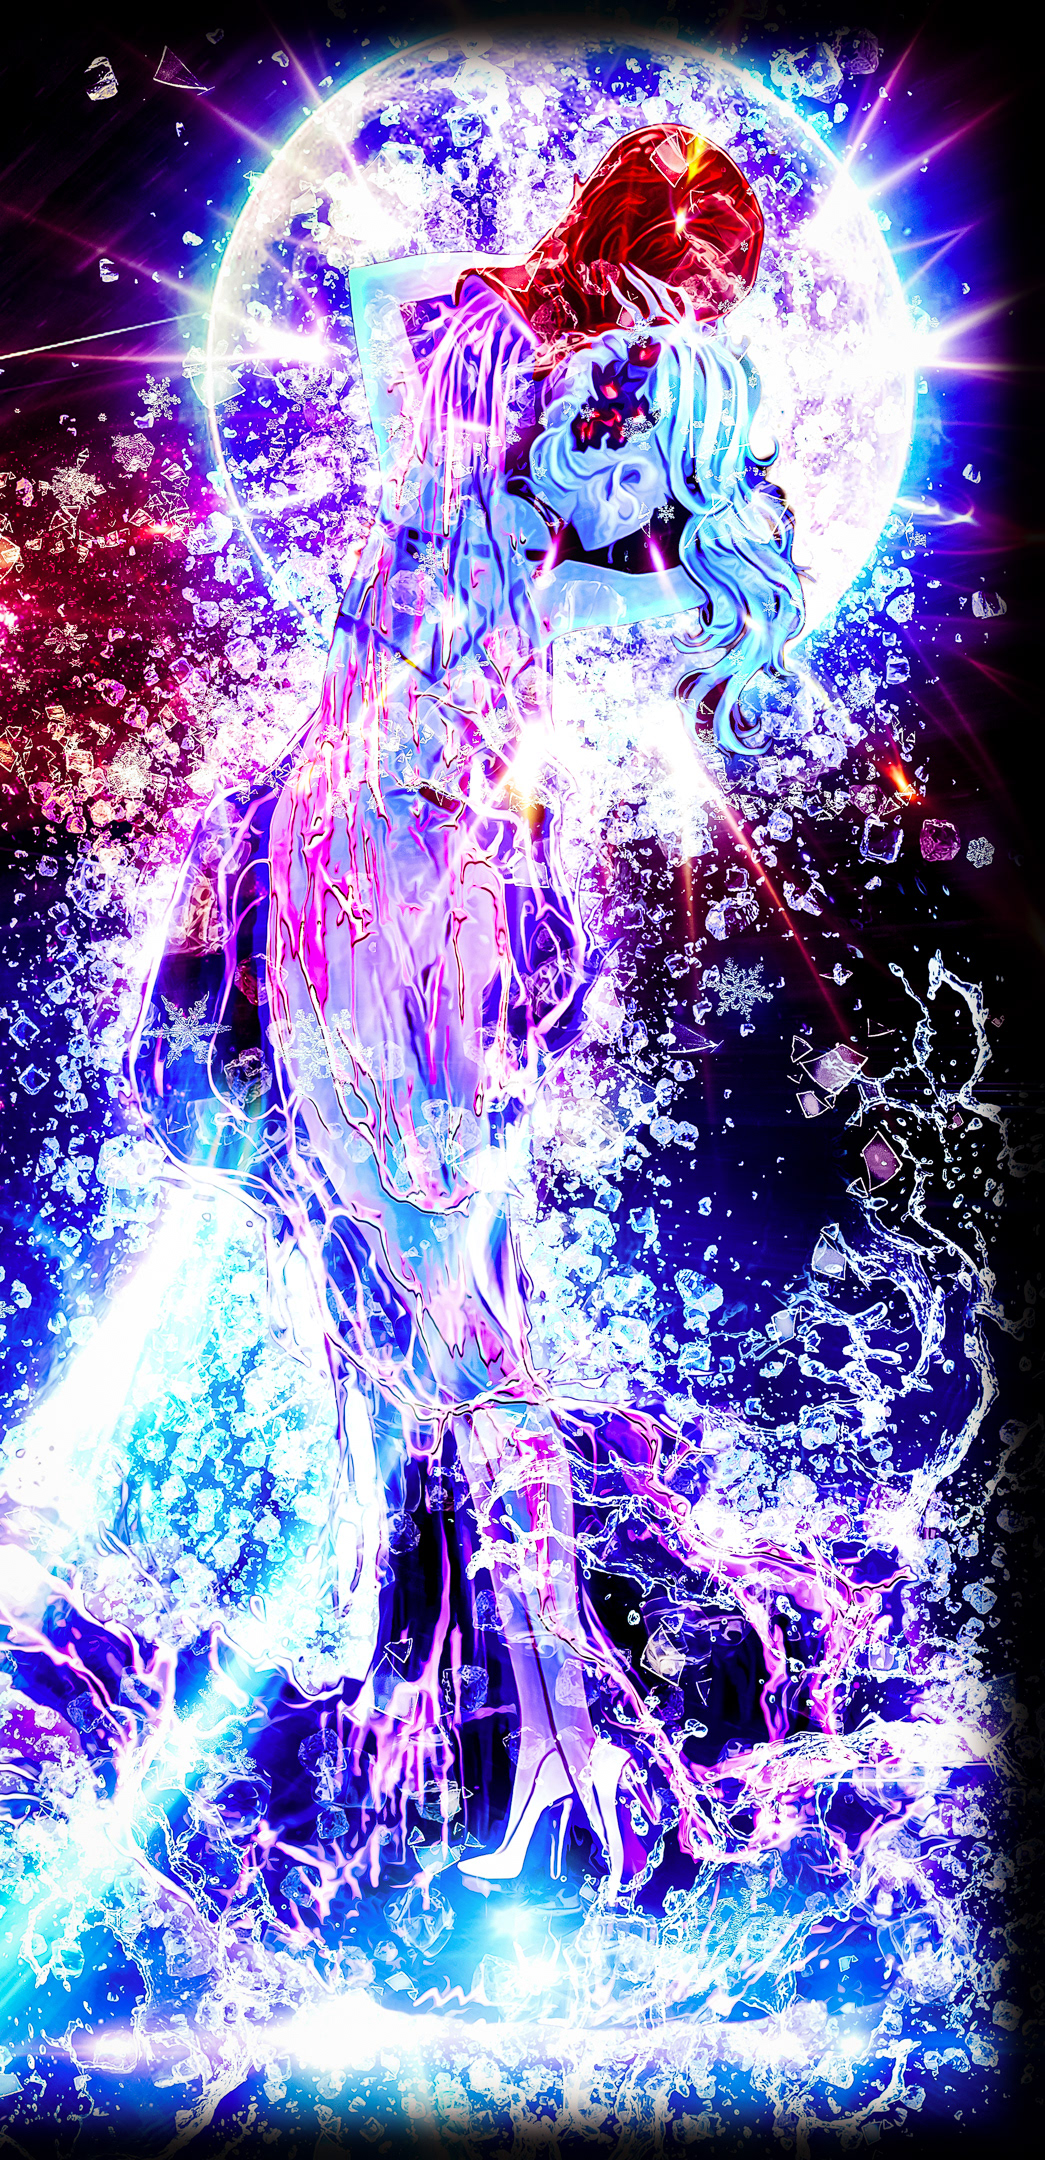
VIII. Photobashing processes - Aquarius Godess.
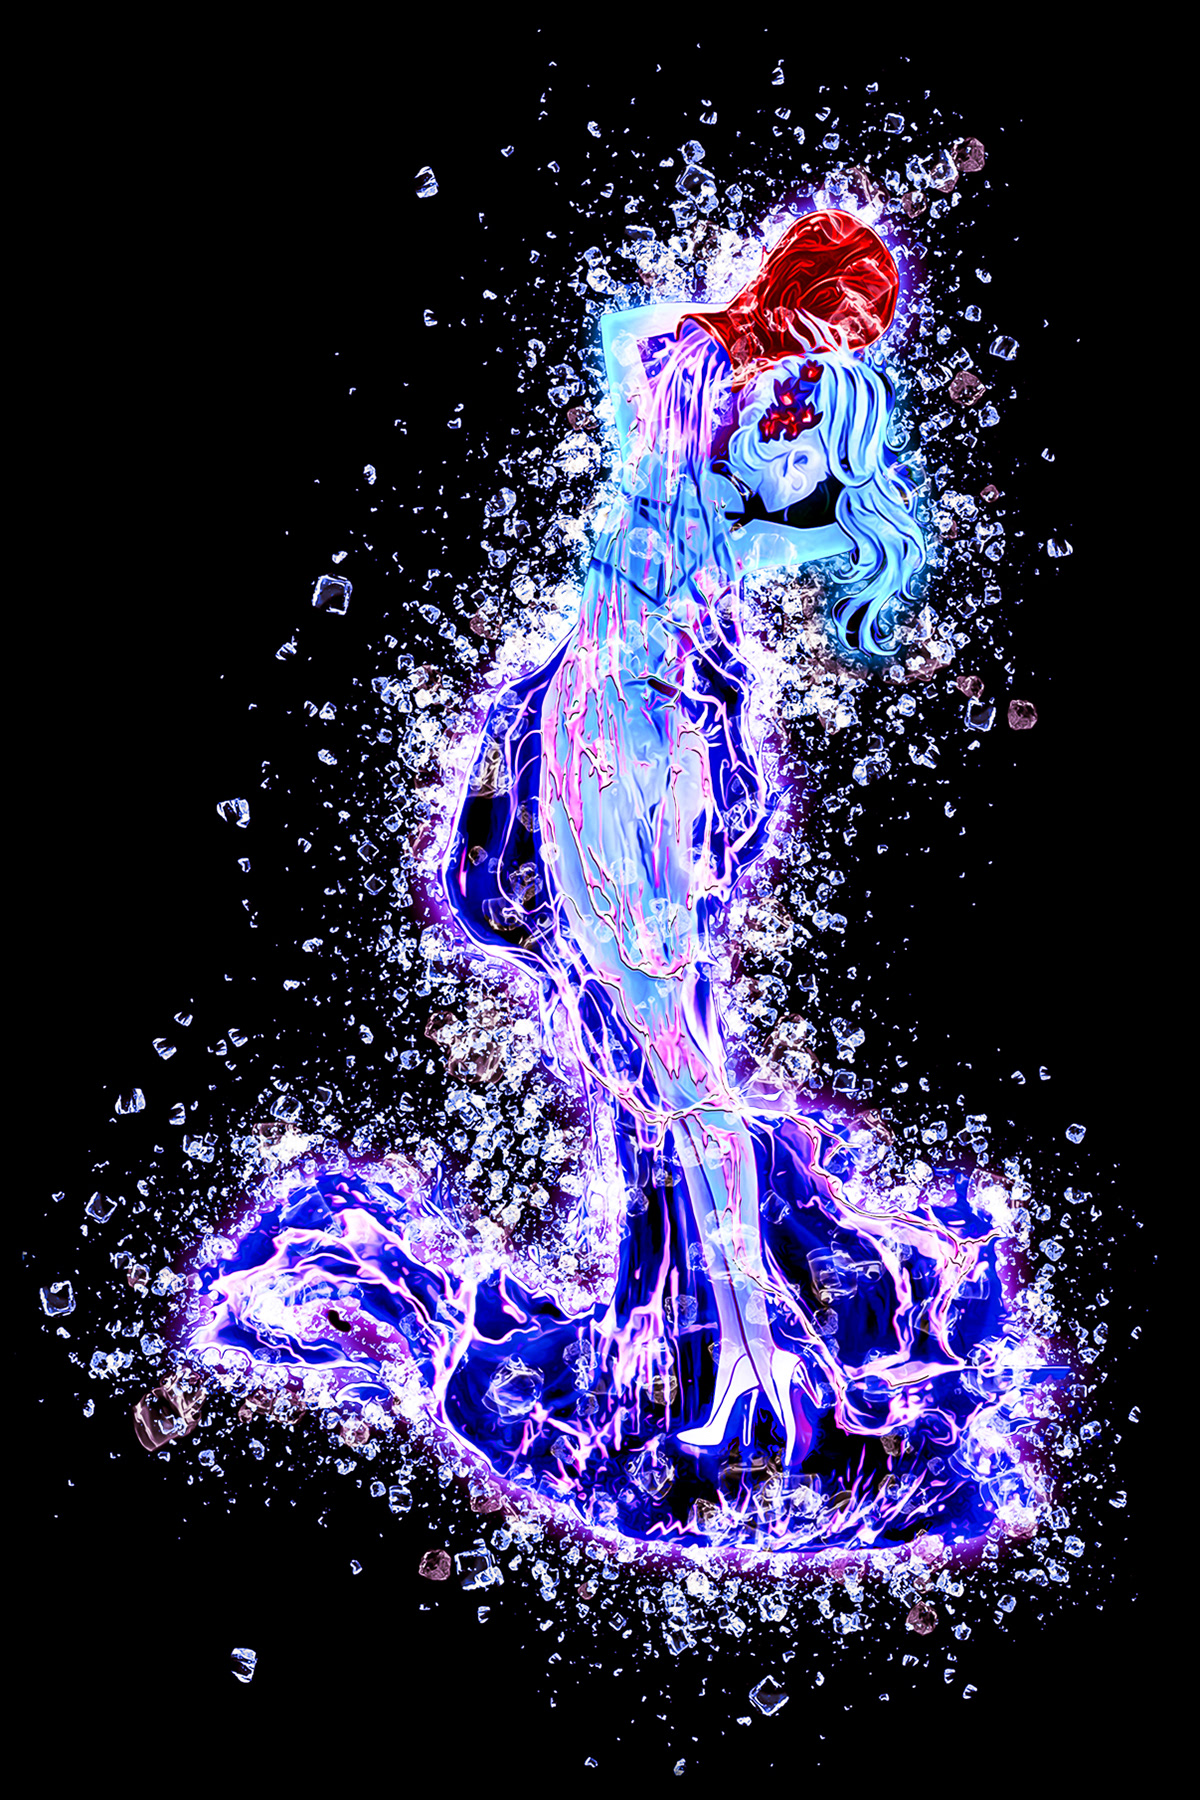
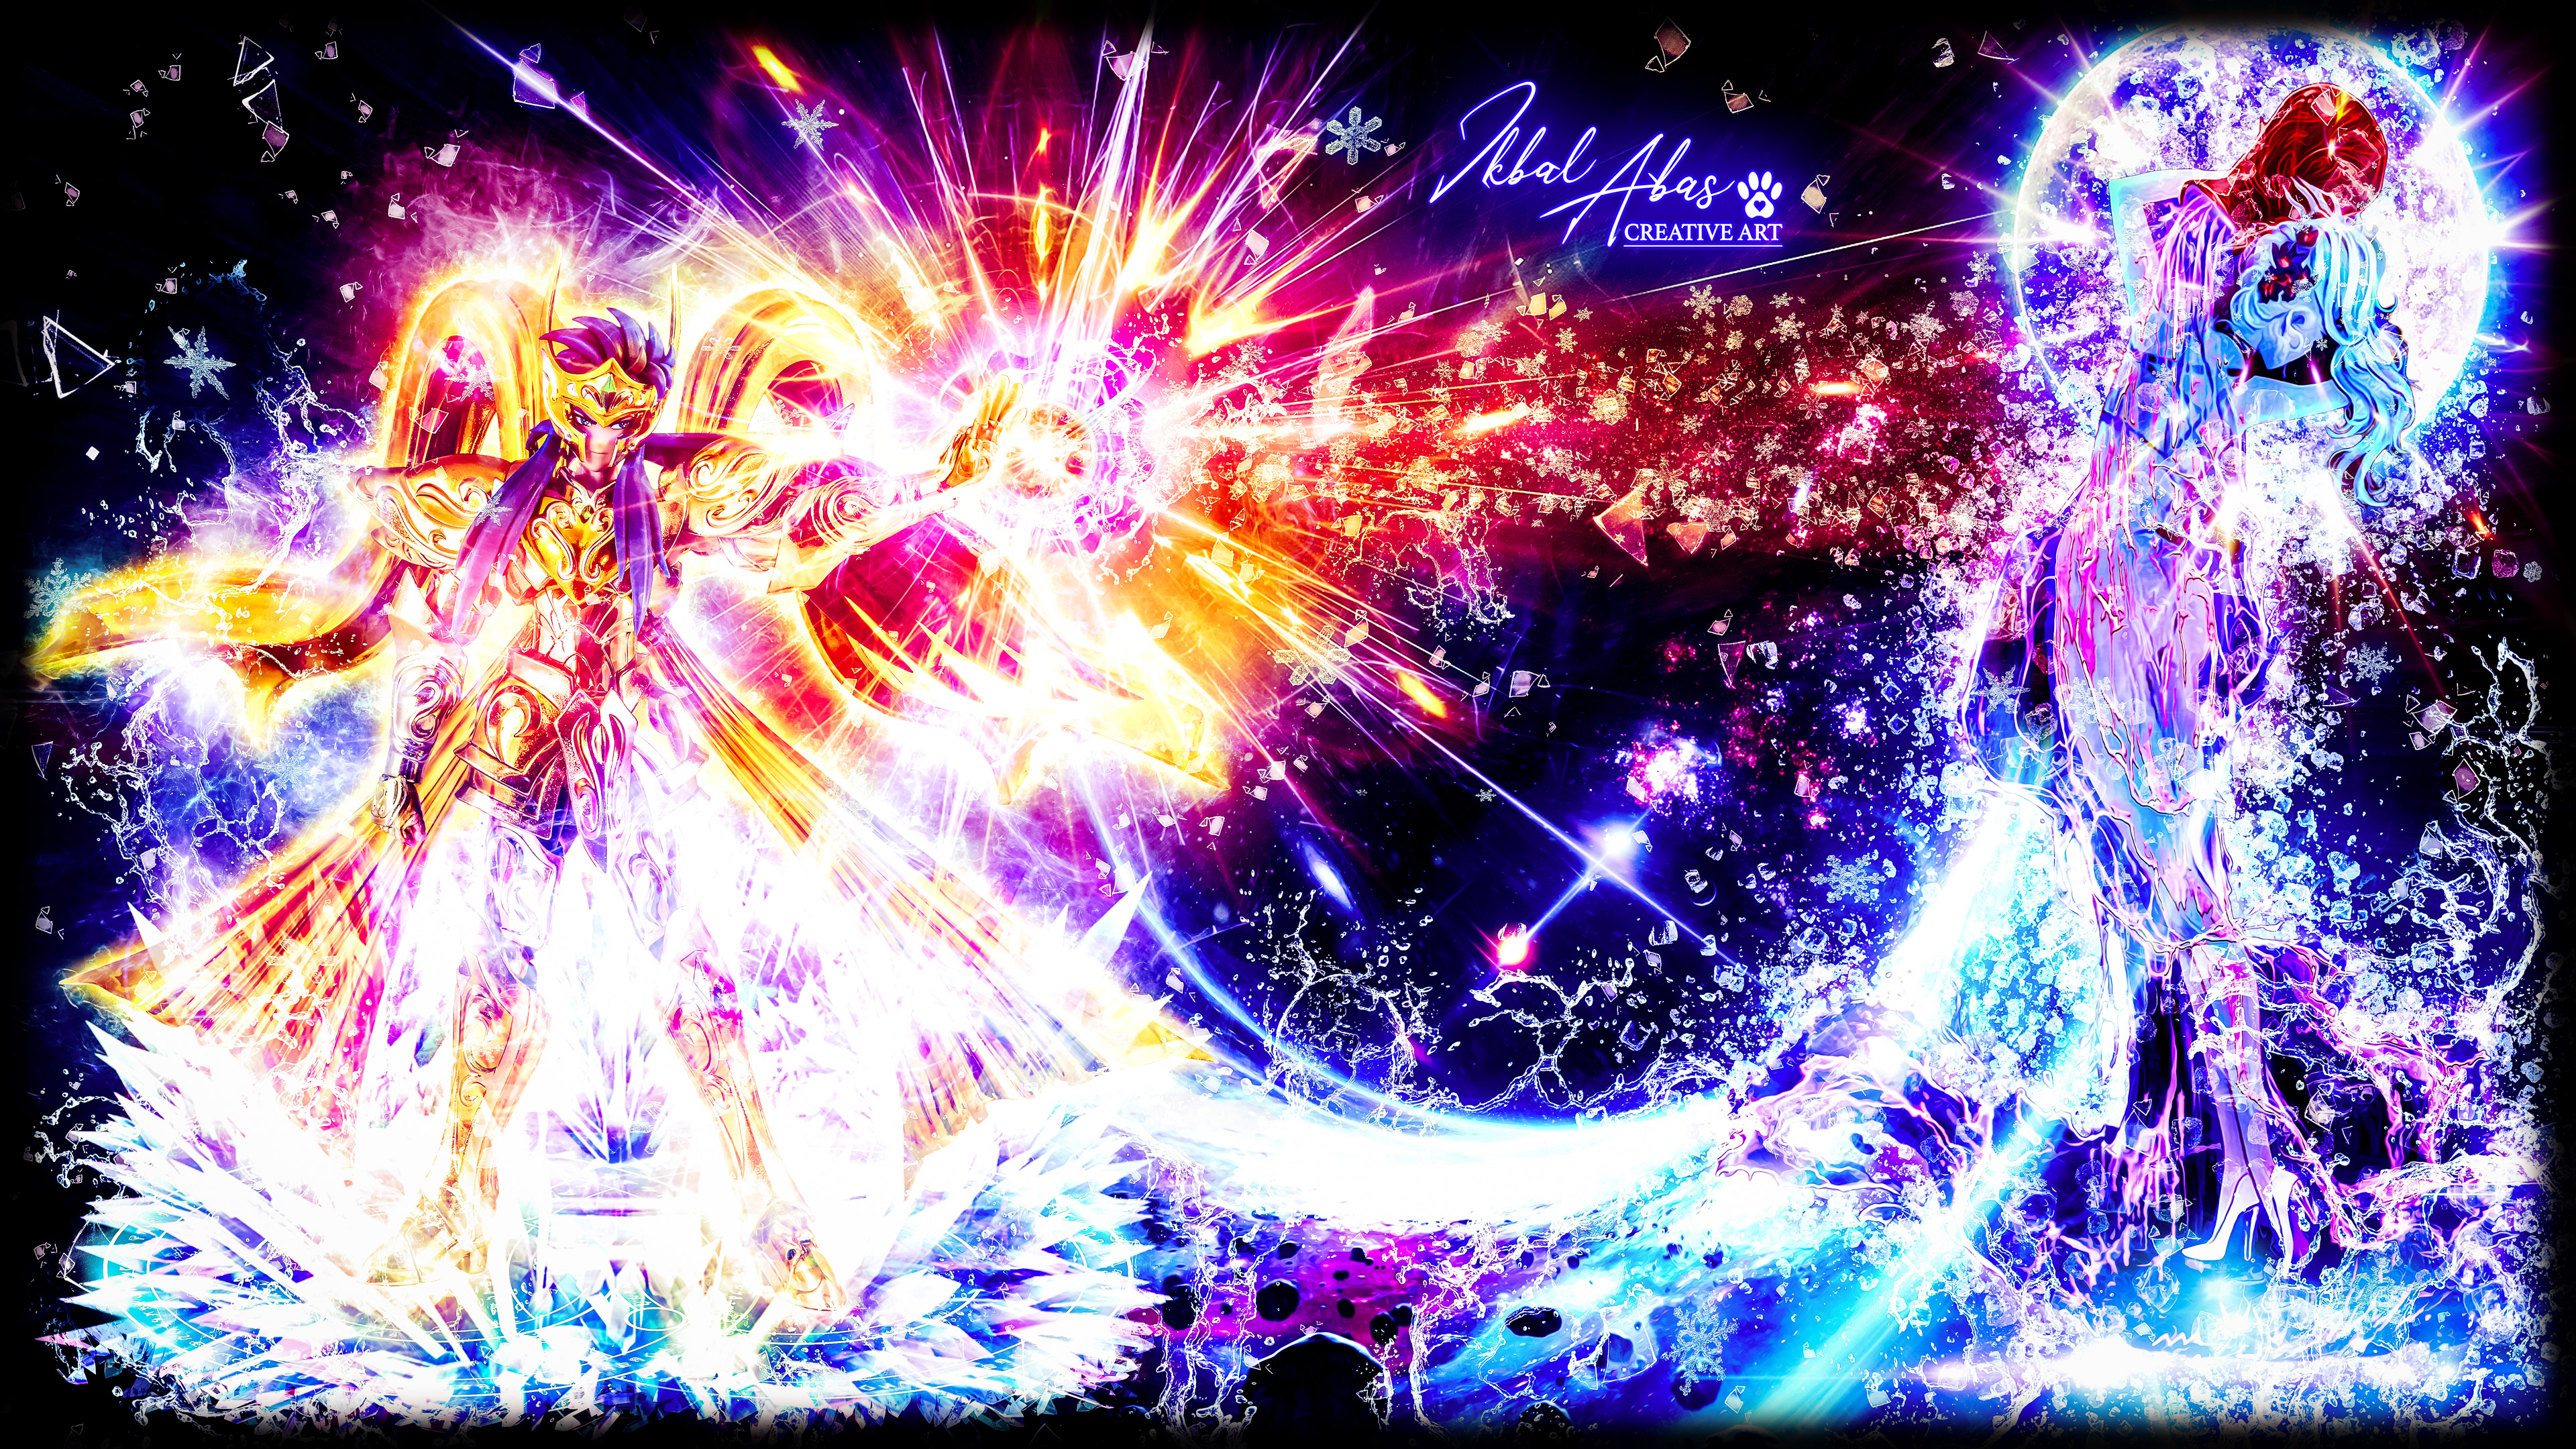
IX. Photobashing processes - Foreground and Background effects.

X. Fine tuning processes.
1. High-pass filter.
- Once the picture is assembled,a high pass filter process is created above all the layers for sharpening purposes.
- All layers are copied and merged into one.
- The resulted merged layer is put above the queue at top, and transformed into a "Smart Object" layer.
- High-pass is applied on the "Smart object", the layer blend mode is then set to "overlay" or "hard-light".
- Opacity is set between 60 to 60% with a 80-90% fill ratio.
- Finally in order to remove color noise, a filter saturation is clipped above the high-pass filter with -100 saturation value.
- The radius of high pass can be changed too into the smart object value (1.2 chosen in this case)
Gratitude to following artists for their great tutorials on high pass sharpening processes:
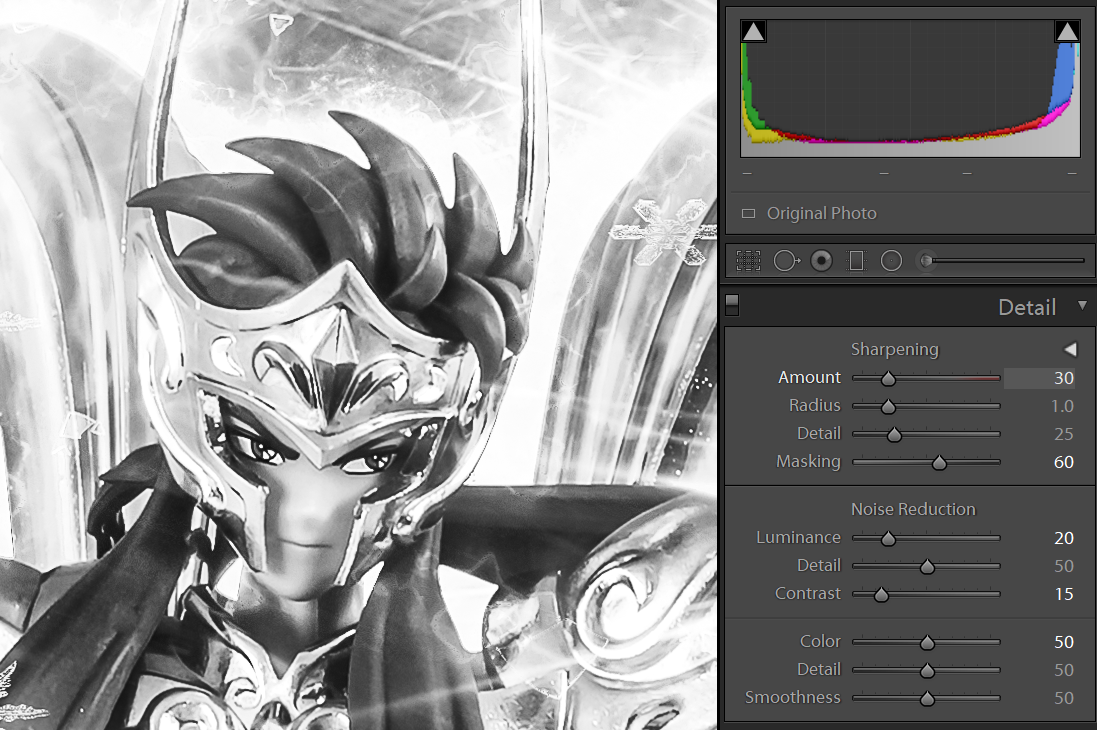
2. Lightroom processes application.
2.1. Detail values are setup. 1:1 zoom is applied.
- Luminance value is fine tuned.
- Sharpening amount too with 10 to 20 more value than Luminance.
- Masking is setup too.
- Color noise around 30 is enough.
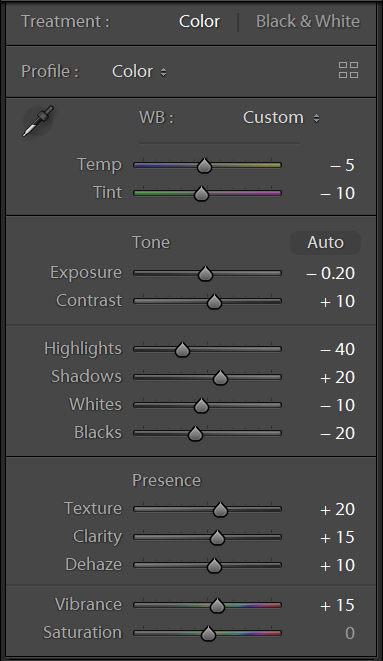
2.2. Basic Settings : Texture and clarity value are setup. (no more than 5 to 15 for clarity).
- Shadows, highlights and black value are setup.
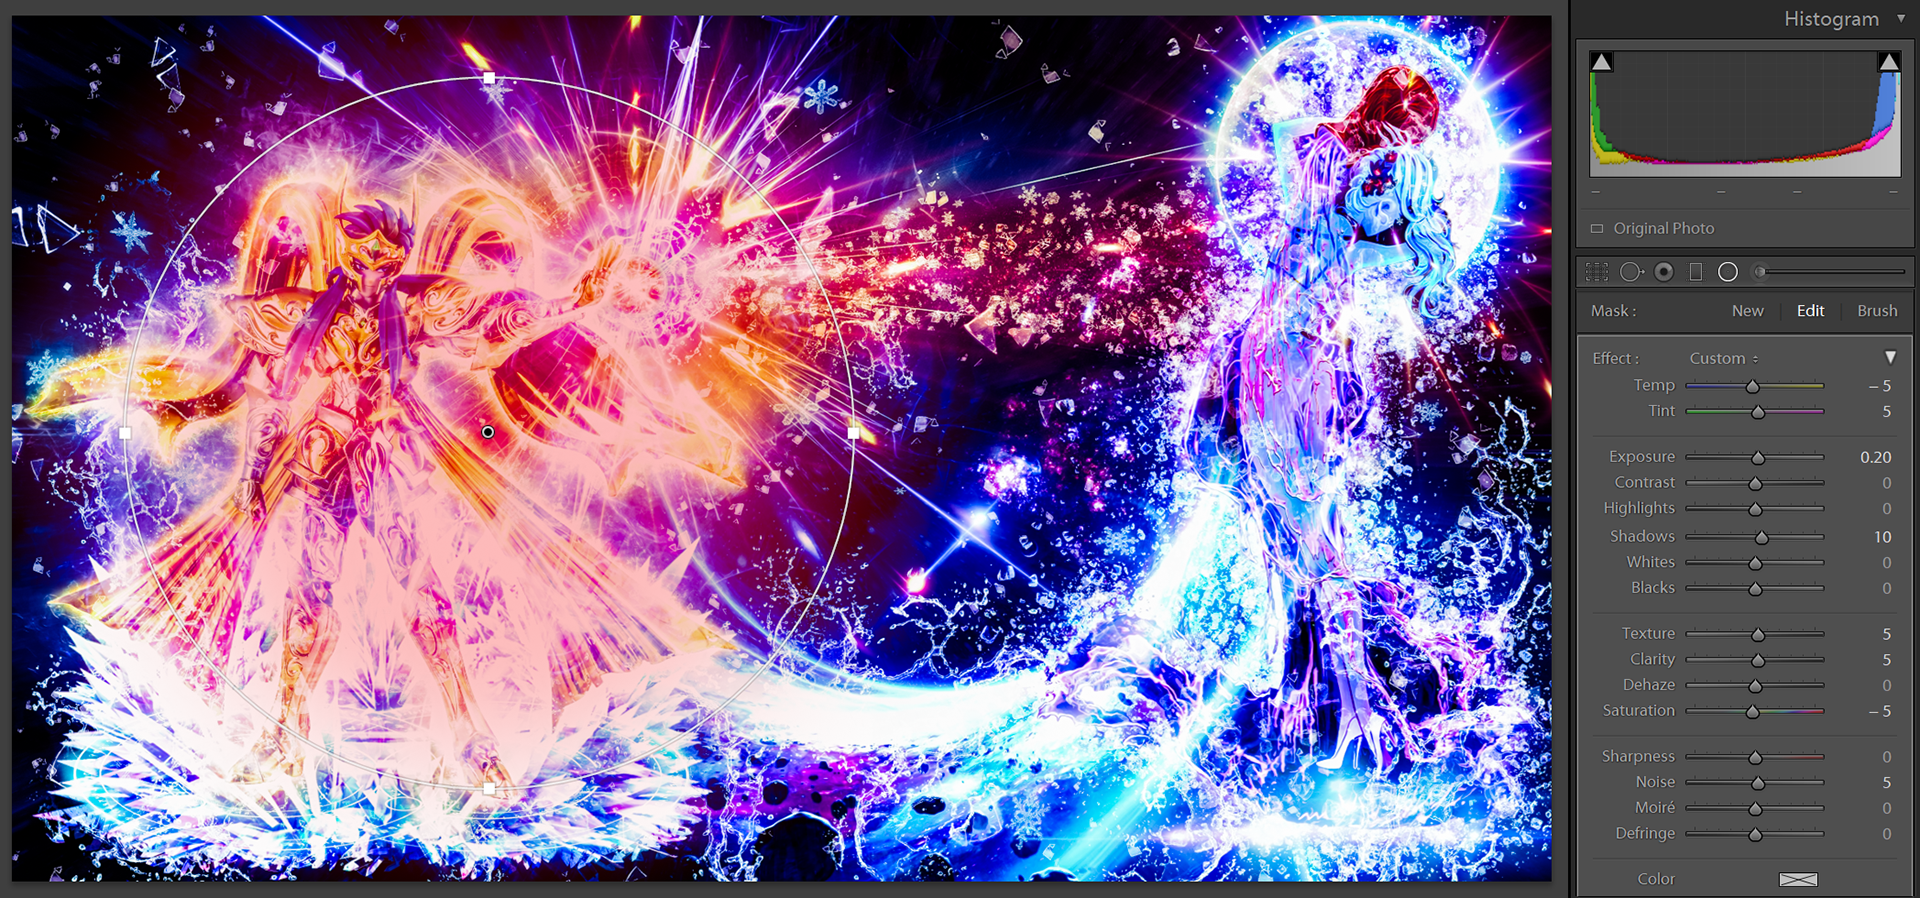
2.4. One radius is added : one on the character in order to enlighten the subject it and by so, darken the environment.
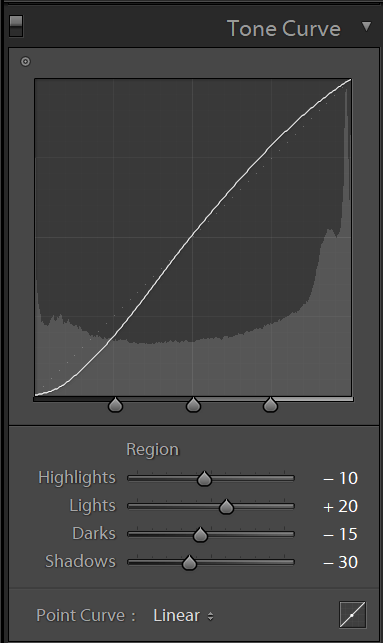
2.5. tone curve settings (slight S form)
3. "Lightroom setting adjustment" copy is edited in "Adobe Photophop".
3.1. Layer is duplicated into another smart object above original layer.
- Smart Sharpen value is applied.
- Opacity is set @ 50% in order to fine tune the smart sharpen value (Amount: 50%; Radius: 1.0px; Reduce Noise: 15%; Remove: Gaussain Blur; Fade Amount for shadows and highlight is 20%; other settings are default values).
3.2 Color correction method is applied by using grey filter
3.3 Application of 2 saturation filters, with "color dodge" and color burn" blend modes where fill ration is set between 3% to 5%.
3.4. Addition of a frame (rectangle tool path, stroke path with black brush @ 70 pixels (or more) with 0% hardness
3.5. File is saved in TIFF format (with layers and no compression)
3.6. Post-crop vignetting process added if needed (-5 to -10) in Lightroom
IX. Credits and acknowledgments.
- Many thanks to the different persons, websites and resources on which I hope they will still contribute to the art and graphic design community. Regarding my creations, I own them a lot even if I did not meet majority of them .
- freepik
Thank you for your time !!!
Very Appreciated !!!
If my work is appreciated I invite you to visit:
- my Behance profile and put a like if you have time,
- or contact me on my facebook/messenger profile , in order to send you the full picture in full resolution or other files if needed ...